14 KiB
Install MAAS
MAAS, Metal As A Service, brings cloud convenience to your hardware, enabling pools of physical servers to be controlled just like virtual machines in the cloud.
On its own, MAAS can perform zero-touch deployments of Windows, Ubuntu, CentOS, RHEL and SUSE. But in combination with Juju, complex environments can be modelled and deployed, pulled down and redeployed again, easily and entirely abstracted from your underlying infrastructure.
We're going to use MAAS as the foundation for Juju to deploy a fully fledged OpenStack cloud.
The following is what you'll find in a typical MAAS environment and we'll use this as the framework for our own deployment:
- A Region controller interacts with and controls the wider environment for a region
- One or more Rack controllers manage locally grouped hardware, usually within a data centre rack
- Multiple Nodes are individual machines managed by the Rack controller, and ultimately, the Region controller
- Complex Networking topologies can be modelled and implemented by MAAS, from a single fabric to multiple zones and many overlapping spaces
What you'll need
MAAS can work at any scale, from a test deployment using a handful of machines to thousands of machines deployed across multiple regions.
It's our intention to build a useful minimal deployment of OpenStack, capable of both performing some real work and scaling to fit more ambitious projects.
To make this minimal configuration as accessible as possible, we'll be using single nodes for multiple services, reducing the total number of machines required. The four cloud nodes, for instance, will co-host Ceph, Glance and Swift, as well as the other services required by OpenStack.
The hardware we'll be using is based on the following specifications:
- 1 x MAAS Rack with Region controller: 8GB RAM, 2 CPUs, 1 NIC, 40GB storage
- 1 x Juju node: 4GB RAM, 2 CPUs, 1 NIC, 40GB storage
- 4 x OpenStack cloud nodes: 8GB RAM, 2 CPUs, 2 NICs, 80GB storage
To get a better idea of the minimum requirements for the machines that run MAAS, take a look at the MAAS documentation.
As with the hardware, our network topology is also going to be as simple as possible whilst remaining both scaleable and functional. It contains a single zone for the four cloud nodes, with the machine hosting the MAAS region and rack controllers connected to both the external network and the single zone. It's recommended that MAAS is the sole provider of DHCP and DNS for the network hosting the nodes MAAS is going to manage, but we'll cover this in an imminent step.
Your hardware could differ considerably from the above and both MAAS and Juju will easily adapt. The Juju node could operate perfectly adequately with half the RAM (this would need to be defined as a bootstrap constraint) and adding more nodes will obviously improve performance.
Note
We'll be using the web UI whenever possible, but it's worth noting that everything (and more) we do with MAAS can also be done from the CLI and the API.
Package installation
The first step is to install Ubuntu Server 16.04 LTS on the machine that's going to host both the MAAS Rack and Region controllers. The Ubuntu Server install menu includes the option to Install and configure both controllers, but to cover more use cases, we will assume that you have a fresh install of Ubuntu Server.
The network configuration for your new server will depend on your own
infrastructure. In our example, the MAAS server network interface
connects to the wider network through 192.168.100.0/24.
These options can be configured during installation. See the Ubuntu
Server Network
Configuration documentation for further details on modifying your
network configuration.
To update the package database and install MAAS, issue the following commands:
sudo apt update
sudo apt install maas
At this point, MAAS is now running, albeit without a meaningful
configuration. You can check this by pointing a web browser at
http://<your.maas.ip>:5240/MAAS/. You will see a page
complaining that no admin user has been created yet.
A MAAS admin account is needed before we can start configuring MAAS. This needs to be done on the command line by typing the following:
sudo maas createadminYou'll be asked for a username, a password and an email address. The
following text will assume admin was used as the
username.
Note
MAAS does not currently make use of the email address.
A final question will ask whether you want to import SSH keys. MAAS
uses the public SSH key of a user to manage and secure access to
deployed nodes, just as you might with managed servers or remote
machines. Press Enter to skip this as we'll do this from
the web UI in the next step.
On-boarding
Now we've created an admin account, the web interface will update to ask for login credentials. With credentials successfully accepted, the web interface will launch the 'Welcome to MAAS' on-boarding page:
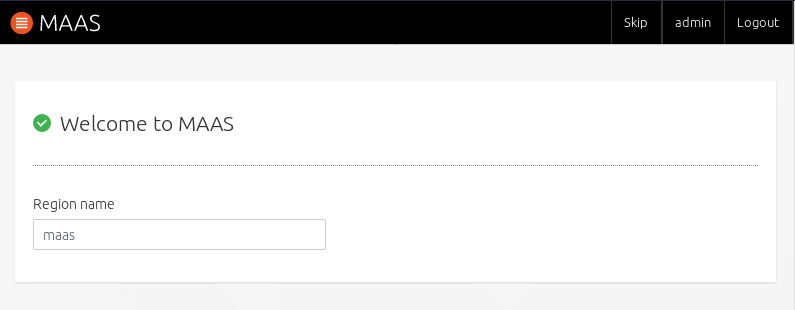
This is the first page of two that will step through the final steps necessary for MAAS to get up and running. Unless you have specific requirements, most of these options can be left at their default values:
- Connectivity: important services that default to being outside of your network. These include package archives and the DNS forwarder.
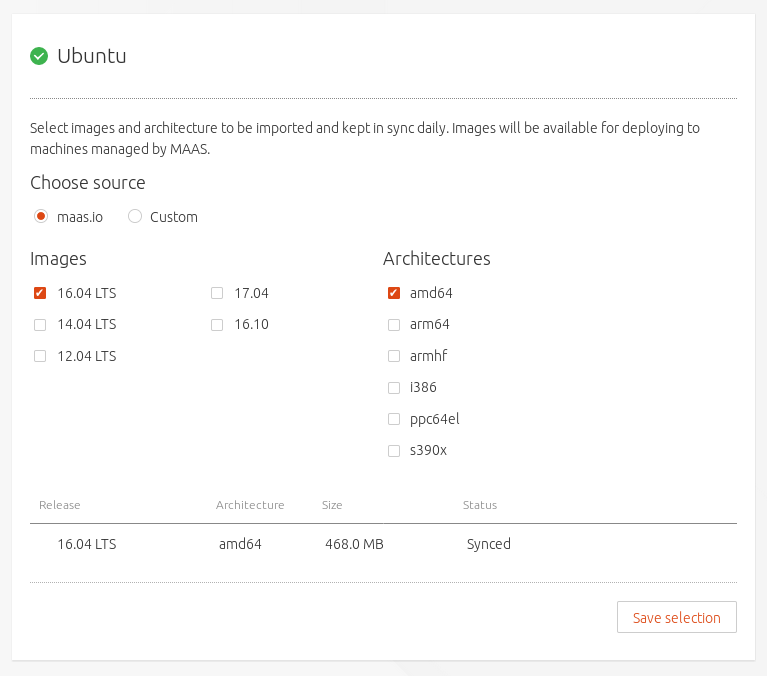
- Ubuntu: this section refers to the versions and
architectures of the Ubuntu images MAAS will import and use on deployed
nodes. Select
14.04 LTSalongside16.04 LTSas an add an additional image.
- Keys: You can conveniently import your public SSH
key(s) from both Launchpad and Github by entering your user id for these
services. To add a local public key file, usually
HOME/ssh/id_rsa.pub, selectUploadand paste file contents into the box that appears. ClickImportto fix the setting.
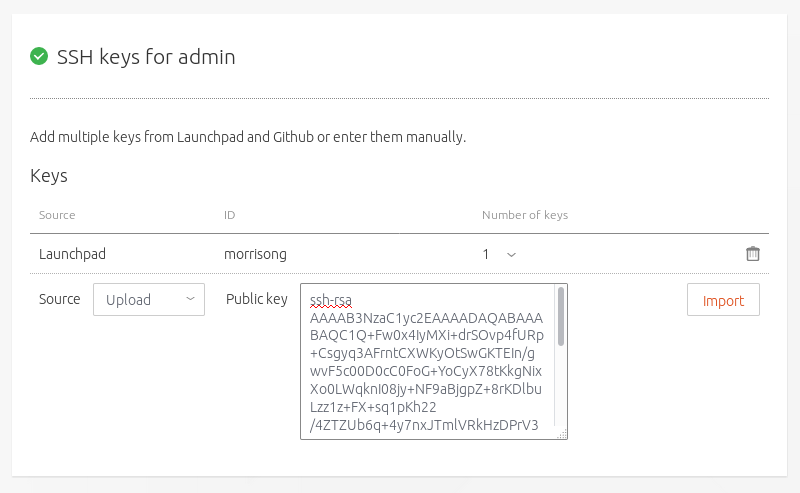
If you need to generate a local SSH public/private key pair, type
ssh-keygen -t rsa from the Linux account you'll control
MAAS from, and when asked, leave the passphrase blank.
Adding SSH keys completes this initial MAAS configuration. Click
Go to the dashboard to move to the MAAS dashboard and the
device discovery process
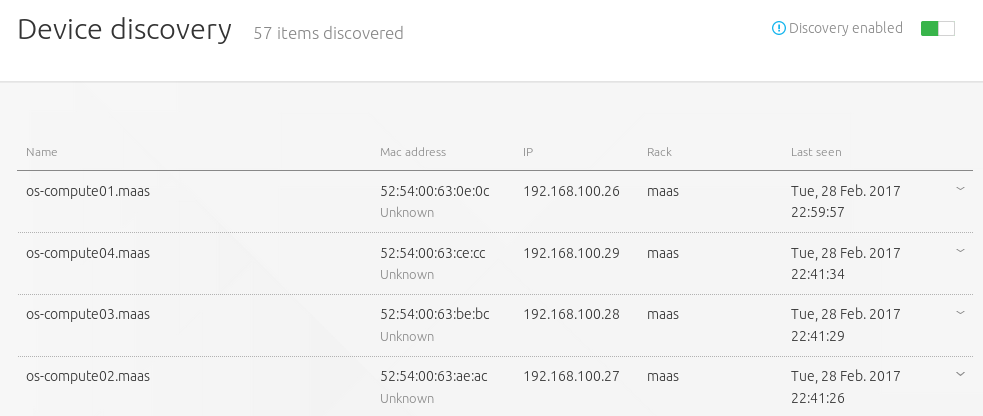
Networking
By default, MAAS will monitor local network traffic and report any devices it discovers on the 'Device discovery' page of the web UI. This page also functions as the landing page for the dashboard and will be the first one you see progressing from the installation on-boarding.
Before taking the configuration further, we need to tell MAAS about our network and how we'd like connections to be configured.
These options are managed from the Subnets page of the
web UI. The subnets page defaults to listing connections by fabric and
MAAS creates one fabric per physical NIC on the MAAS server. As we're
configuring a machine with a single NIC, a single fabric will be listed
linked to the external subnet.
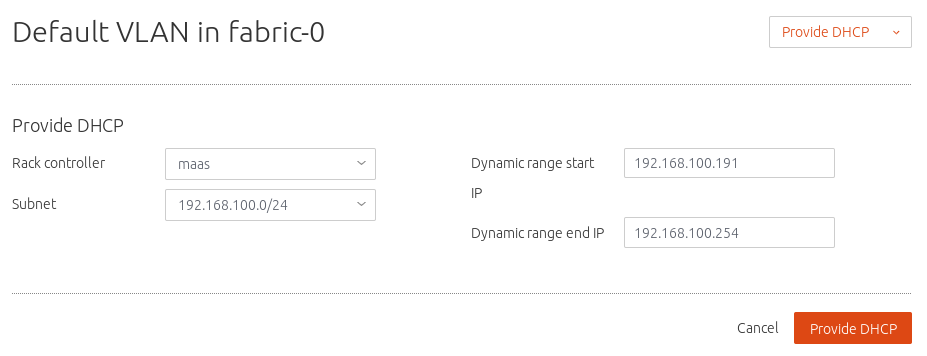
We need to add DHCP to the subnet that's going to manage the nodes.
To do this, select the untagged VLAN the subnet to the
right of fabric-0.
The page that appears will be labelled something similar to
Default VLAN in fabric-0. From here, click on the
Take action button in the top right and select
Provide DHCP. A new pane will appear that allows you to
specify the start and end IP addresses for the DHCP range. Select
Provide DHCP to accept the default values. The VLAN summary
should now show DHCP as Enabled.
Note
See Concepts and Terms in the MAAS documentation for clarification on the terminology used within MAAS.
Images
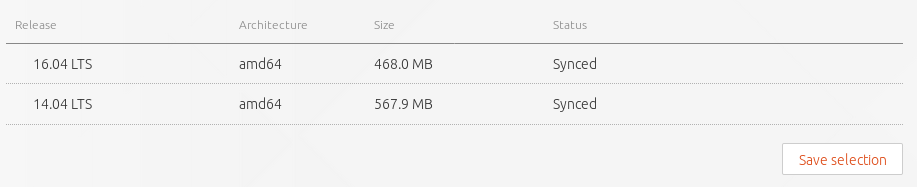
We have already downloaded the images we need as part of the on-boarding process, but it's worth checking that both the images we requested are available. To do this, select the 'Images' page from the top menu of the web UI.
The Images page allows you to download new images, use a
custom source for images, and check on the status of any images
currently downloaded. These appear at the bottom, and both 16.04 LTS and
14.04 LTS should be listed with a status of Synced.
Adding nodes
MAAS is now ready to accept new nodes. To do this, first ensure your four cloud nodes and single Juju node are set to boot from a PXE image. Now simply power them on. MAAS will add these new nodes automatically by taking the following steps:
- Detect each new node on the network
- Probe and log each node's hardware (using an ephemeral boot image)
- Add each node to the
Nodespage with a status ofNew
Though less satisfying, we'd recommend powering up each node one at a time, as it can be difficult to know which is which at this stage.
In order to fully manage a deployment, MAAS needs to be able power cycle each node. This is why MAAS will attempt to power each node off during the discovery phase. If your hardware does not power off, it's likely that it's not using an IPMI based BMC and you will need to edit a node's power configuration to enable MAAS to control its power. See the MAAS documentation for more information on power types, including a table showing a feature comparison for the supported BMC drivers.
To edit a node's power configuration, click on the arbitrary name
your machine has been given in the Nodes page. This will
open the configuration page for that specific machine.
Power is the second section from the top.
Use the drop-down Power type menu to open the
configuration options for your node's specific power configuration and
enter any further details that the configuration may require.
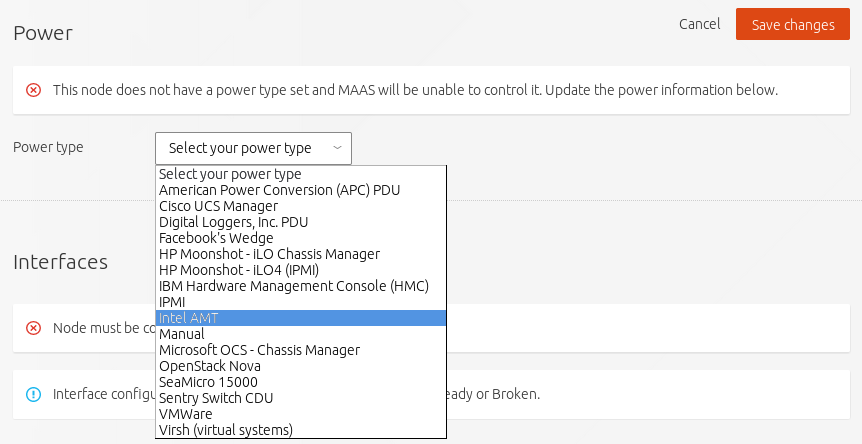
Click Save changes when finished. You should now be able
to power off the machine using the Take action menu in the
top right.
Commission nodes
From the Nodes page, select all the check boxes for all
the machines in a New state and use the
Take action menu to select Commission. After a
few minutes, successfully commissioned nodes will change their status to
Ready. The CPU cores, RAM, number of drives and storage
fields should now correctly reflect the hardware on each node.
For more information on the different states and actions for a node, see Node actions in the MAAS documentation.
We're now almost at the stage where we can let Juju do its thing. But
before we take that next step, we're going to rename and
tag the newly added nodes so that we can instruct Juju
which machines to use for which purpose.
To change the name of a node, select it from the Nodes
page and use the editable name field in the top right. All nodes will
automatically be suffixed with .maas. Click on
Save to fix the change.
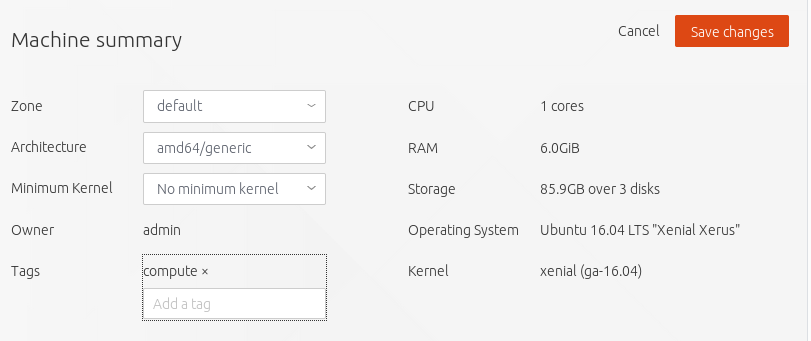
Tags are normally used to identify nodes with specific hardware, such
GPUs for GPU-accelerated CUDA processing. This allows Juju to target
these capabilities when deploying applications that may use them. But
they can also be used for organisational and management purposes. This
is how we're going to use them, by adding a compute tag to
the four cloud nodes and a juju tag to the node that will
act as the Juju controller.
Tags are added from the Machine summary section of the
same individual node page we used to rename a node. Click
Edit on this section and look for Tags. A tag
is added by entering a name for the tag in the empty field and clicking
Save changes.
Here's a summary of the status of each node we've now added to MAAS, showing their names and tags alongside each node's hardware configuration:
| Node name | Tag(s) | CPUs | NICs | RAM | Drives | Storage |
|---|---|---|---|---|---|---|
| os-compute01.maas | compute | 2 | 2 | 6.0 | 3 | 85.9 |
| os-compute02.maas | compute | 2 | 2 | 6.0 | 3 | 85.9 |
| os-compute03.maas | compute | 2 | 2 | 6.0 | 3 | 85.9 |
| os-compute04.maas | compute | 2 | 2 | 6.0 | 3 | 85.9 |
| os-juju01.maas | juju | 2 | 1 | 4.0 | 1 | 42.9 |
Next steps
Everything is now configured and ready for our next step. This will involve deploying the Juju controller onto its own node. From there, we'll be using Juju and MAAS together to deploy OpenStack into the four remaining cloud nodes.