5.0 KiB
Plugin configuration
To configure Kaminario K2 Cinder plugin for Fuel:
Create an OpenStack environment as described in the Fuel User Guide:
As part of the Create New OpenStack Environment wizard, click Storage Backends (fourth step in the wizard). The following screen appears:
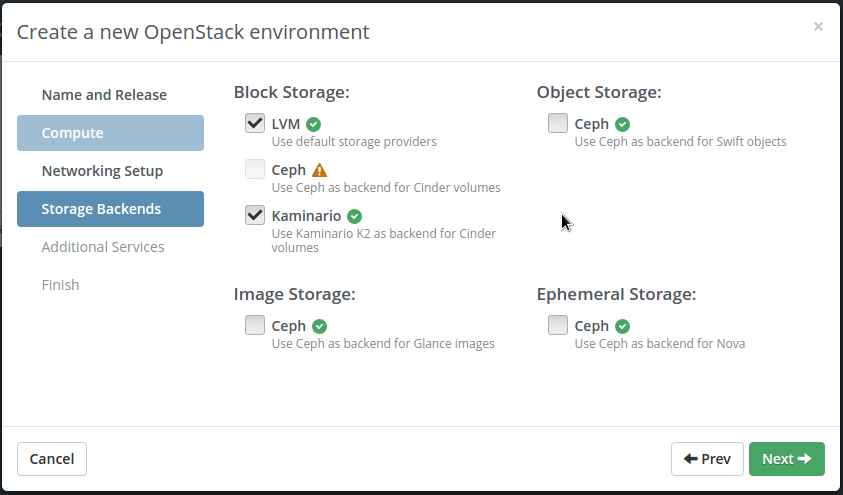
Under Block Storage, select the Kaminario checkbox.
Click Next twice to finish the OpenStack Environment setup.
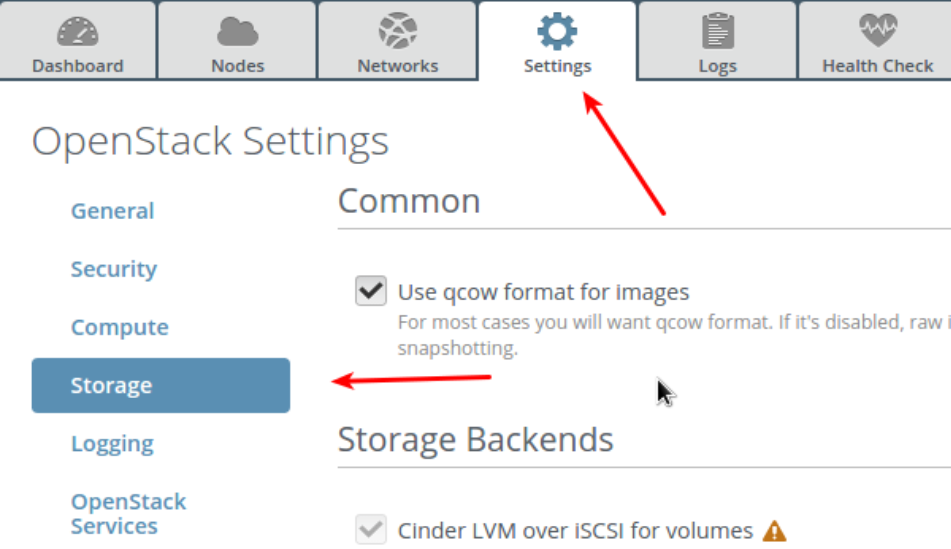
In the Fuel environment, click the Settings tab.
In the navigation pane, click Storage snd scroll down to the Kaminario K2 for Cinder section.
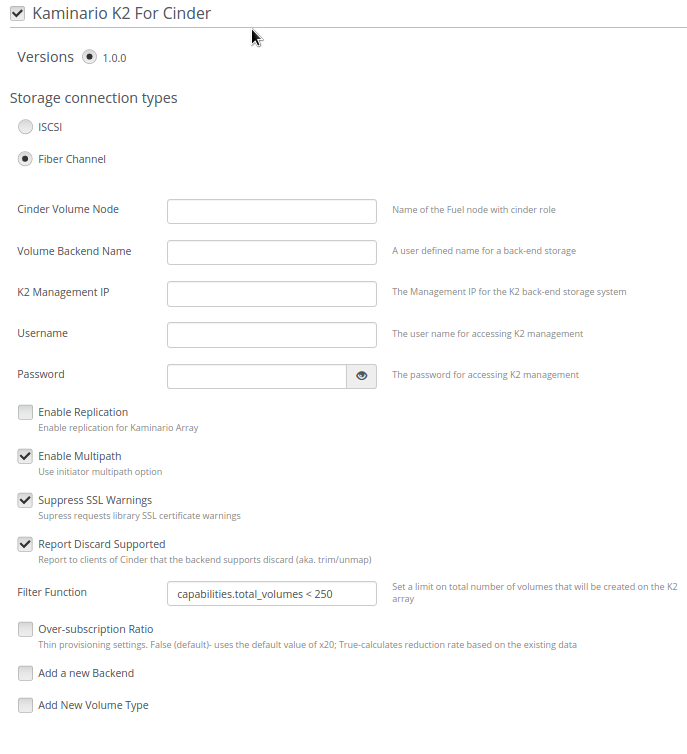
Under Storage Connection Types, select ISCSI for Kaminario K2 iSCSI array or Fiber Channel for Kaminario K2 Fiber Channel array.
In the Cinder Volume Node field, enter the name of the Fuel node with Cinder role.
In the Volume Backend Name field, enter a name for the backend storage.
In the K2 Management IP field, enter the manaagement IP address for the K2 backend storage system.
In the username field, enter the username for accessing the K2 management.
In the password field, enter the password for accessing the K2 management.
In the Enable Replication checkbox, select the check box if you wish to enable replication for the K2 array. Please refer to the section Configuring Replication
In te Enable Multipath checkbox, select the check box if you wish to enable the multipath option.
In the Surpress SSL Warnings checkbox, select the check box if you wish to suppress requests library SSL certificate warnings.
In the Report Discard Supported select the checkbox if you wish to enable trim/unmap.
In the Filter Function field, enter a limit on total number of volumes that will be created on the K2 array.
example: "capabilities.total_volumes < 250"
In the Over-Subscription Ratio checkbox, if you don’t select the checkbox the system will use the default value of x20; Selecting the checkbox, calculates the reduction rate based on the existing data.
Adding a new backend
If you want to configure multiple K2 backends, follow the steps below.
To add a new backend:
Select the Add a New Backend checkbox.
New fields appear for the second backend
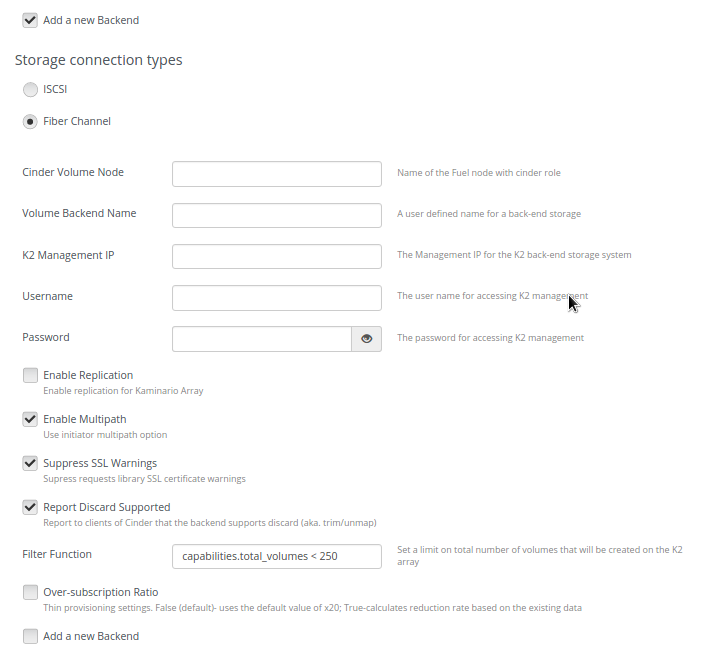
Fill in the new backend fields by repeating the steps mentioned above.
Adding a new volume type
You can define a new volume type. Volume types will be associated with specific backends through the Volume Backend Name. For each volume type, you can specify attributes that will determine if the volume type includes deduplication and/or replication.
The system includes the following default settings:
Deduplication is enabled
Replication is disabled
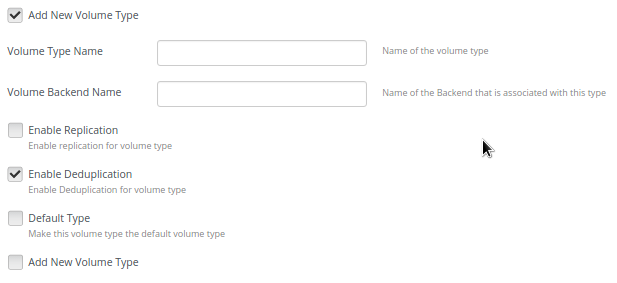
Select the Add New Volume Type checkbox.
New fields appear for configuring the new volume type.
In the Volume Type Name field, enter a user-defined and unique name for the volume type.
In the Volume Backend Name field, enter the name of the backends that will be associated with this volume type.
If the volume type should include replication, select the Enable Replication checkbox.
If the volume type should not include deduplication, de-select the Enable Deduplication checkbox.
If you want to make this volume type the default volume type (Cinder will use this volume type when no other volume type have been specified), select the Default Type checkbox.
To create additional volume types, select the Add New Volume Type checkbox and repeat the steps above.
Configuring Replication
As part of the configuration of the backend storage, you can configure replication.
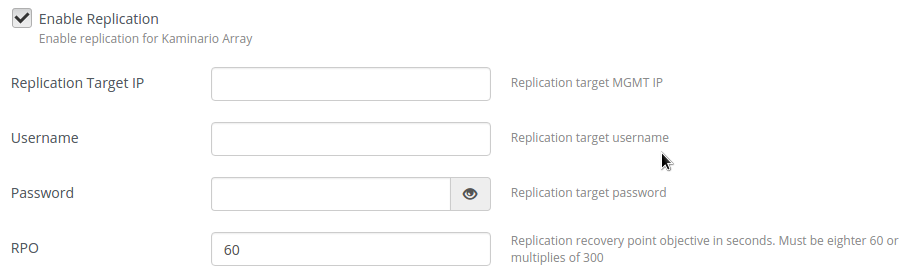
To configure replication:
Select the Enable Replication checkbox.
New fields appear for configuring the replication target.
In the Replication Target IP field, enter the replication target management IP address.
In the Username field, enter the username for accessing the replication target.
In the Password field, enter the password for accessing the replication target.
In the RPO field, enter the recovery objective point in seconds. The value must be either 60 or multiples of 300 seconds.
If you have completed the configuration, click Save Settings.