5.9 KiB
Configuring LDAP plugin
Create a new OpenStack environment to use an existing LDAP server as authentication backend for Keystone. For more information about environment creation, see Mirantis OpenStack User Guide <http://docs.openstack.org/developer/fuel-docs /userdocs/fuel-user-guide/create-environment.html>.
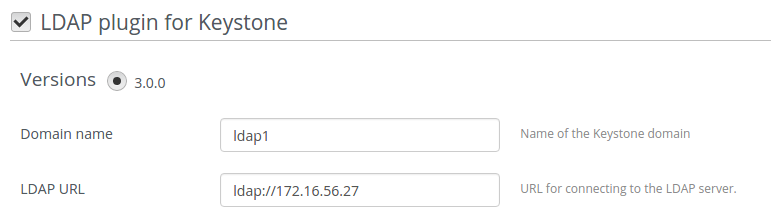
Open Settings tab of the Fuel Web UI, scroll the page down and select the LDAP plugin for Keystone checkbox:
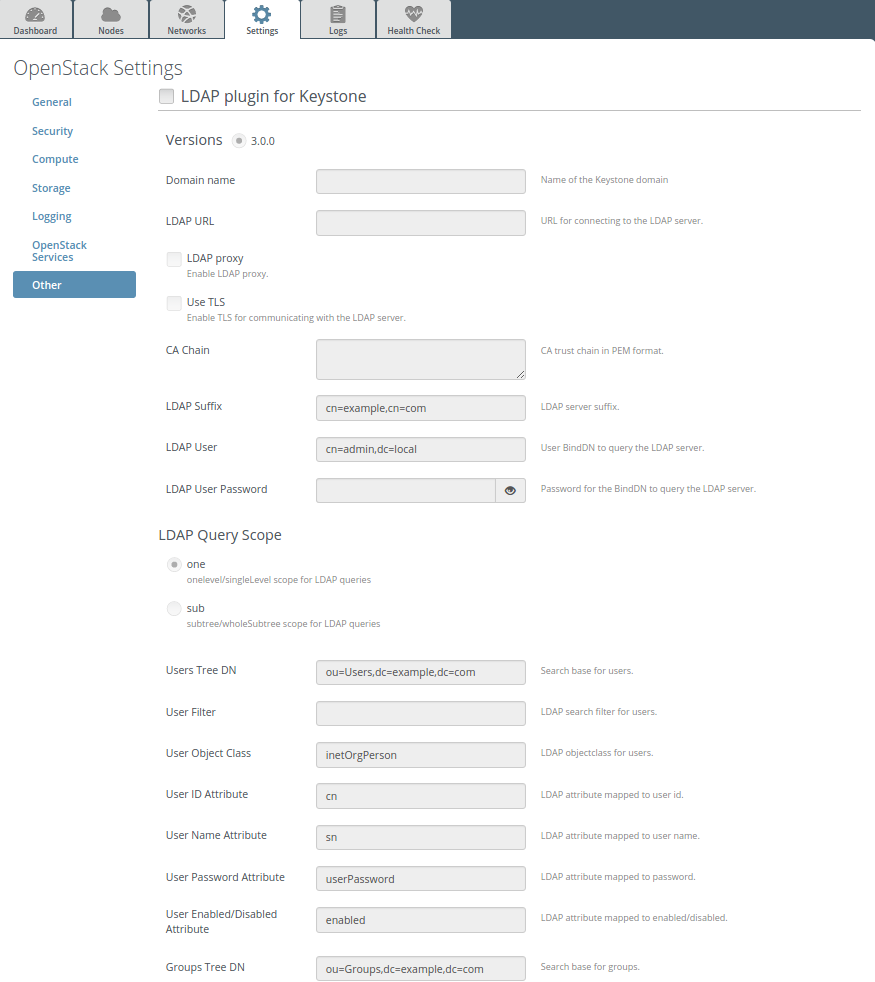
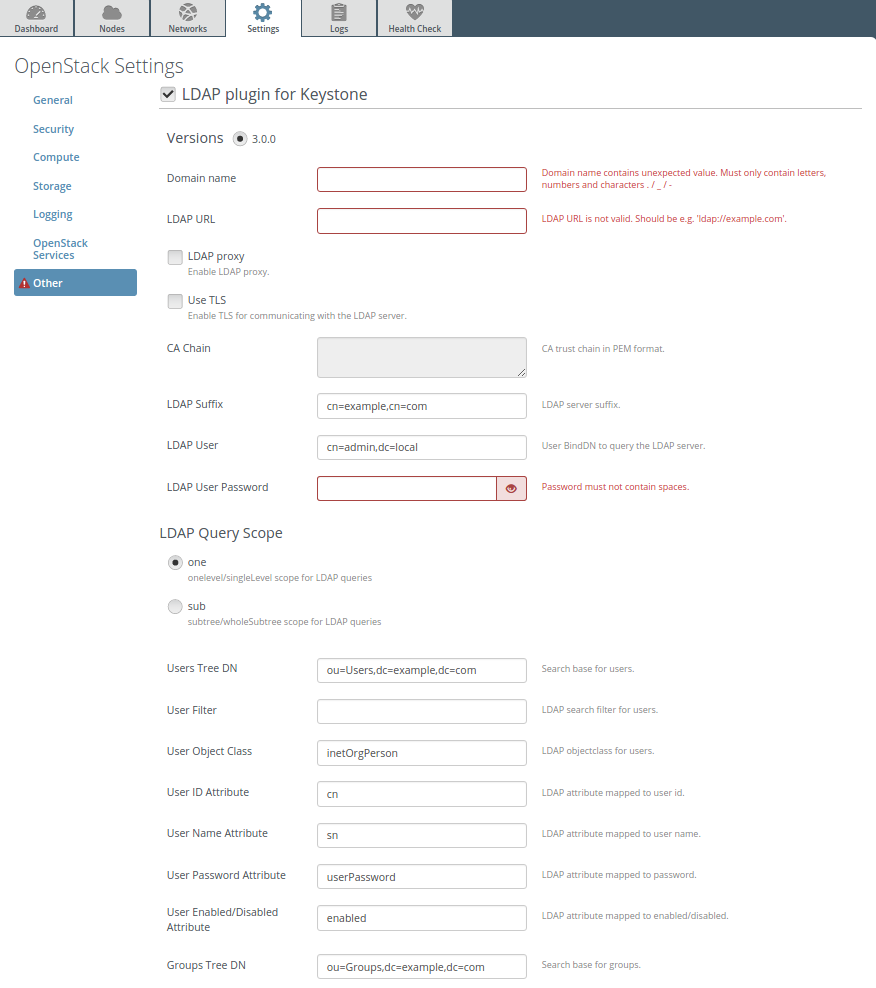
Enter plugin settings into the text fields:
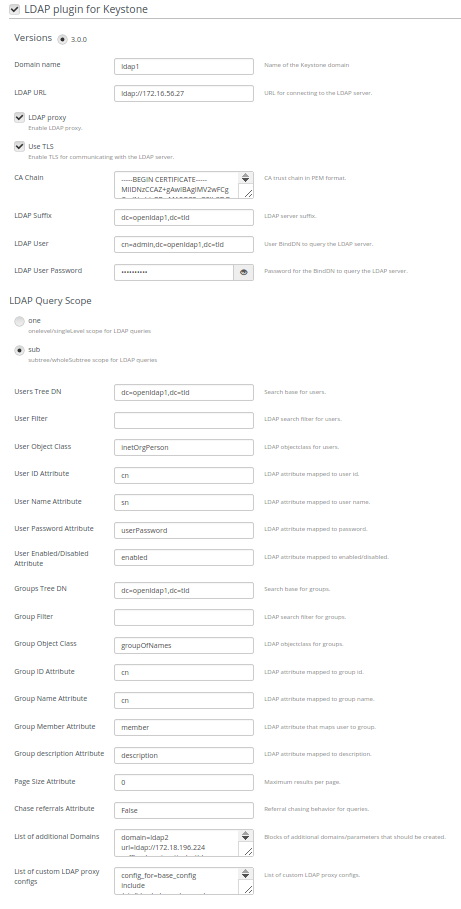
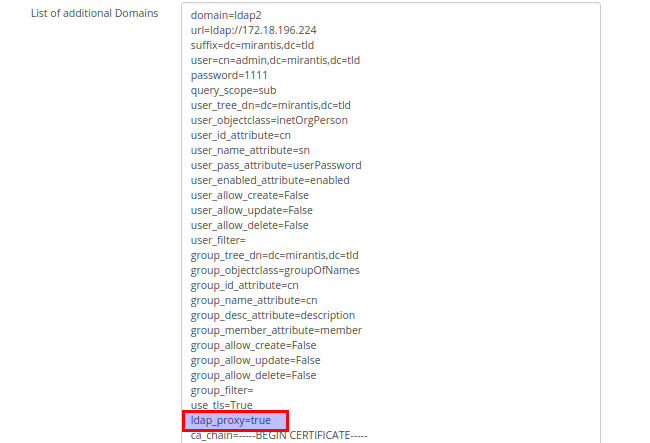
Specify domain name, LDAP URL, LDAP suffix:

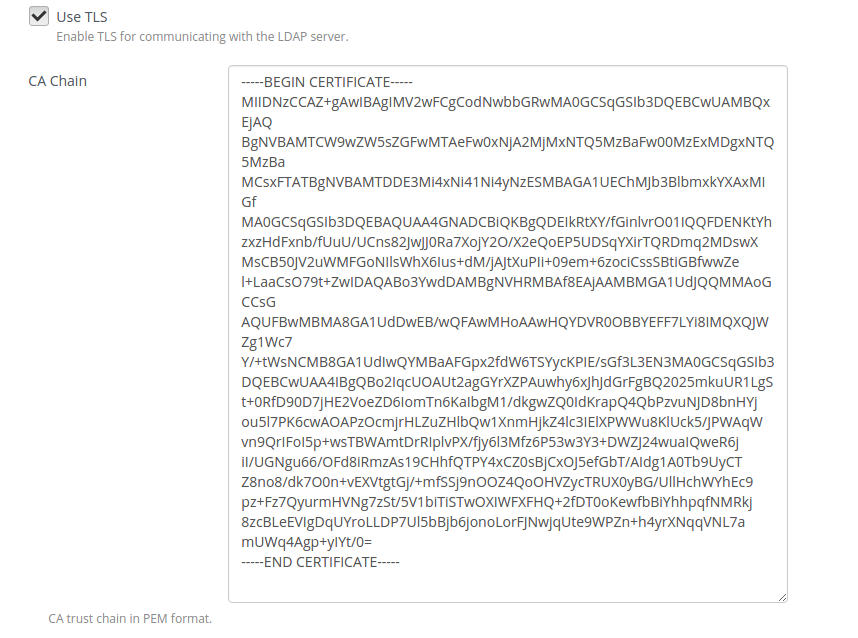
Enable TLS use and put certificate if it is needed:
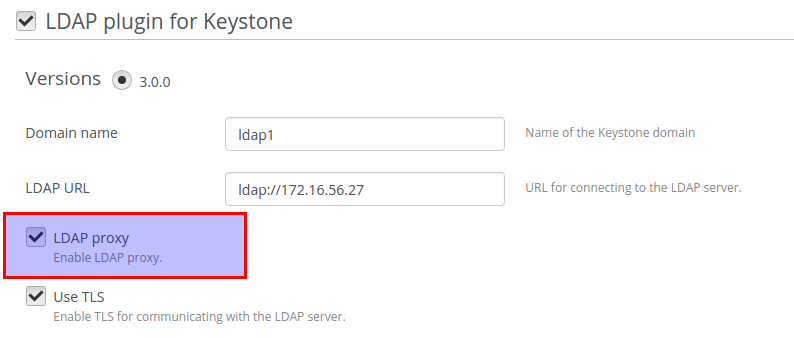
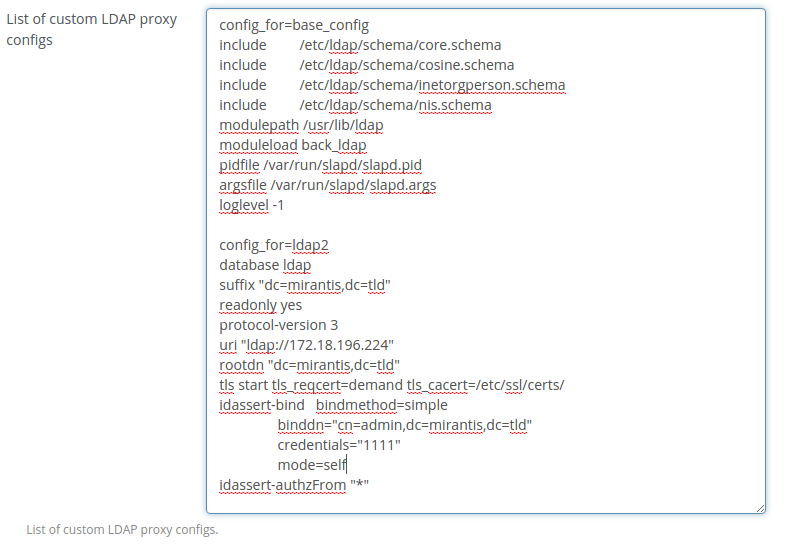
Enable LDAP proxy and put custom config if it is needed:
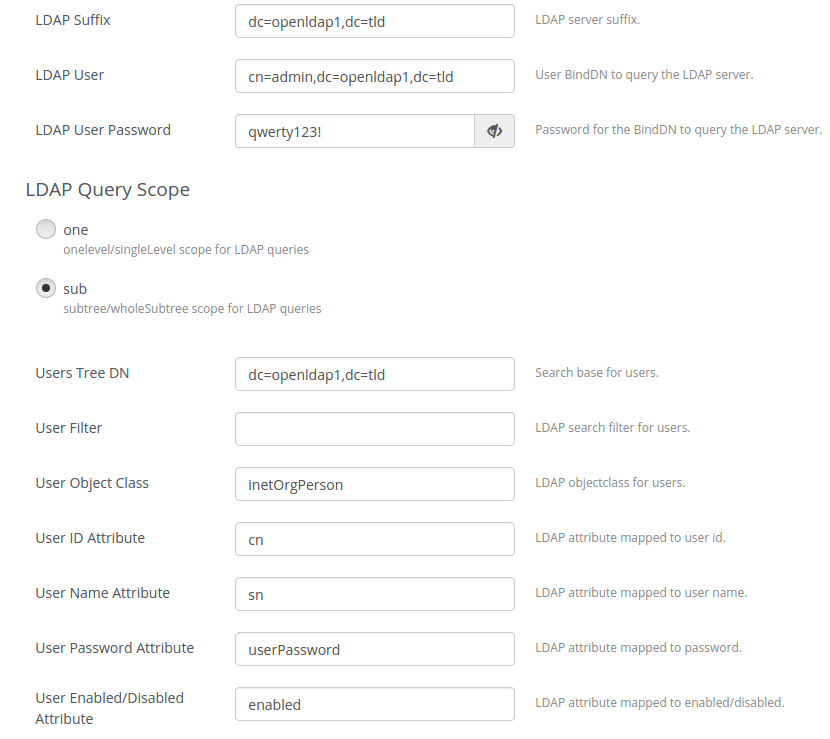
Specify LDAP user, password and other settings:
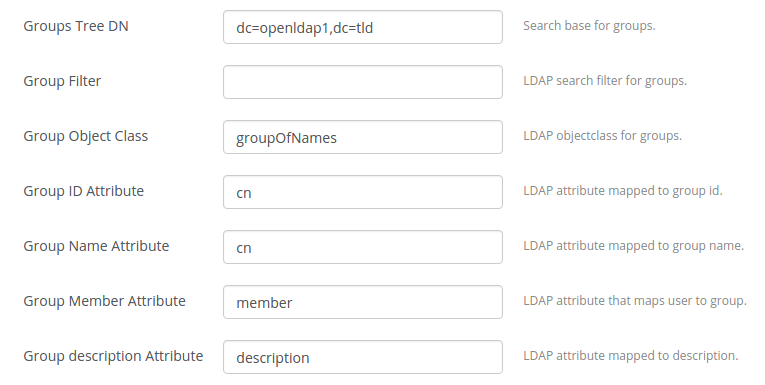
To use LDAP groups provide settings for it:
Fields description:
Field Comment Domain name Name of the Keystone domain. LDAP URL URL for connecting to the LDAP server. LDAP proxy Enable LDAP proxy. Use TLS Enable TLS for communicating with the LDAP server. CA Chain CA trust chain in PEM format. LDAP Suffix LDAP server suffix. LDAP User User BindDN to query the LDAP server. LDAP User Password
Password for the BindDN to query the LDAP server.
LDAP Query Scope
The LDAP scope for queries, this can be either "one" (onelevel/singleLevel) or "sub" (subtree/wholeSubtree).
Users Tree DN Search base for users. User Filter LDAP search filter for users. User Object Class LDAP objectclass for users. User ID Attribute LDAP attribute mapped to user id. User Name Attribute LDAP attribute mapped to user name. User Password Attribute LDAP attribute mapped to password. User Enabled/Disabled Attribute LDAP attribute mapped to enabled/disabled. Groups Tree DN Search base for groups. Group Filter LDAP search filter for groups. Group Object Class LDAP objectclass for groups. Group ID Attribute LDAP attribute mapped to group id. Group Name Attribute LDAP attribute mapped to group name. Group Member Attribute LDAP attribute that maps user to group. Group description Attribute LDAP attribute mapped to description. Page Size Attribute Maximum results per page. Chase referrals Attribute Referral chasing behavior for queries. List of additional Domains Blocks of additional domains/parameters that should be created. List of custom LDAP proxy configs
List of custom LDAP proxy configs.
To deploy an environment with support of multiple domains 'List of additional Domains' text area should be used. All needed parameters that describes a domain should be copied there, all parameters form a block of parameters.
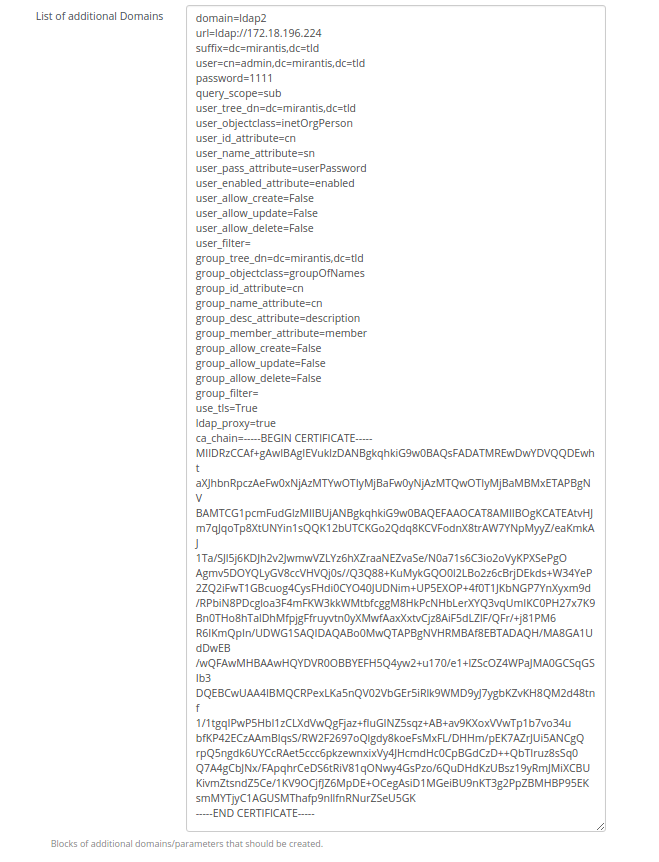
To add multiple domains such block of parameters should be added to 'List of additional Domains' text area and these blocks should be separated by empty line.
To set up an environment with activated LDAP proxy 'LDAP proxy' checkbox should be selected. When only 'LDAP proxy' checkbox is selected: it activates LDAP proxy for base domain and activates LDAP proxy for additional domains if they have 'ldap_proxy=true' parameter in their configurations.
In this case LDAP proxy configurations for LDAP domains are taken from templates located in the plugin. Configurations from the templates have minimal functionality and they are intended for testing needs.
To specify custom settings for LDAP proxy 'List of custom LDAP proxy configs' text area should be used. There can be specified base settings for a proxy service: 'includes', loglevel and etc. can be added to a proxy configuration file. For this 'config_for' parameter with 'base_config' value should be specified and after that needed settings should be added.

To specify custom settings for LDAP domain 'config_for' parameter with <domain_name> value should be added and after that custom settings can be specified.
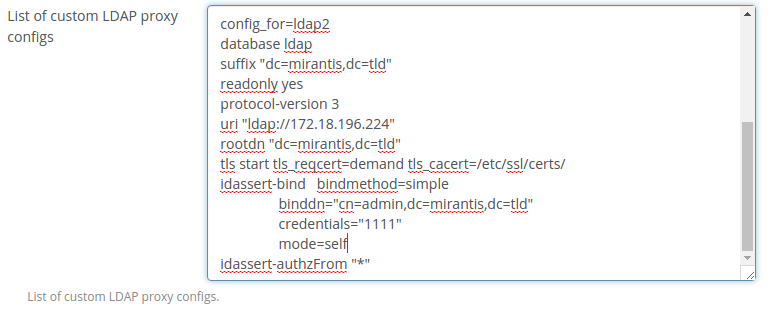
Blocks of custom settings should be separated by empty line.
- #.Continue with environment configuration and deploy it;
-
for instructions, see Fuel User Guide.
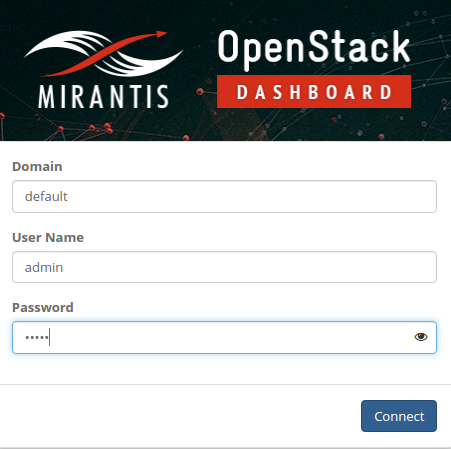
After successful environment deployment log into dashboard in default domain:
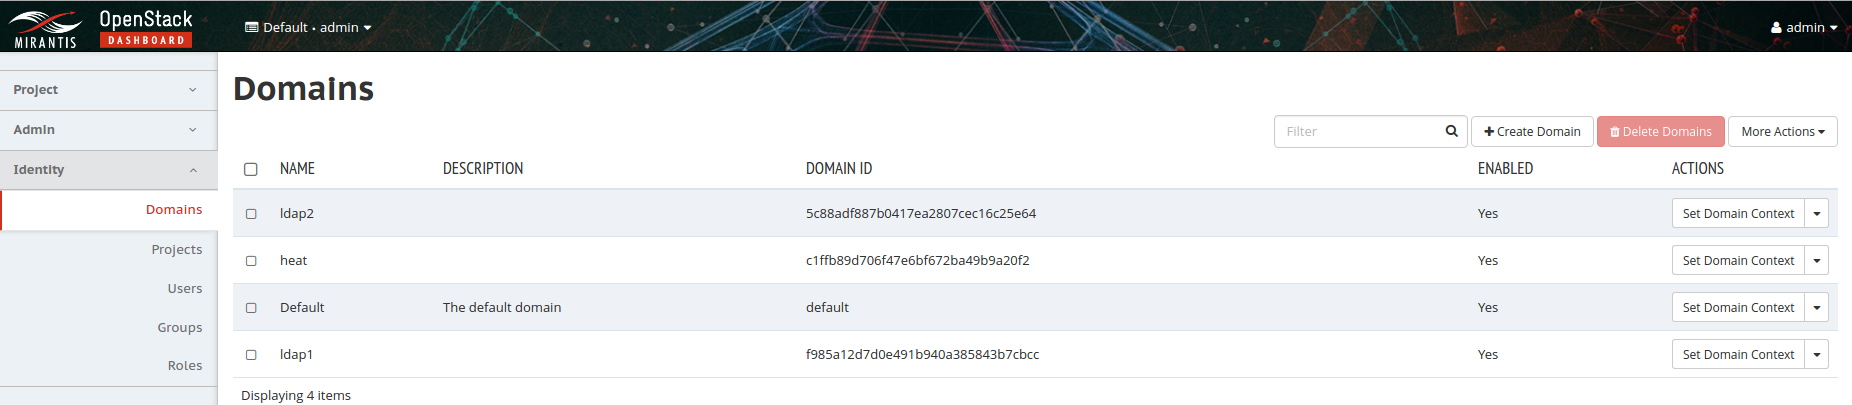
Go to Identity -> Domains, select needed domain and 'Set Domain Context' for the domain:

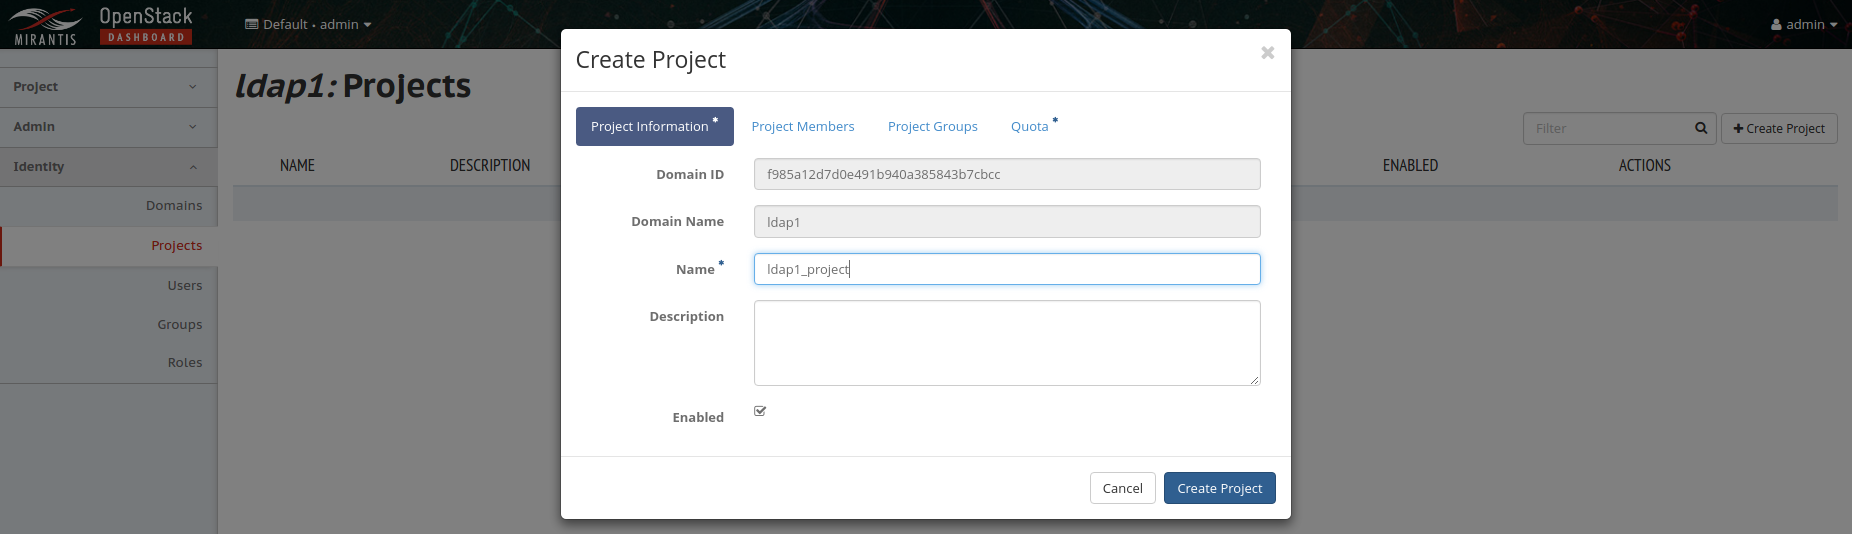
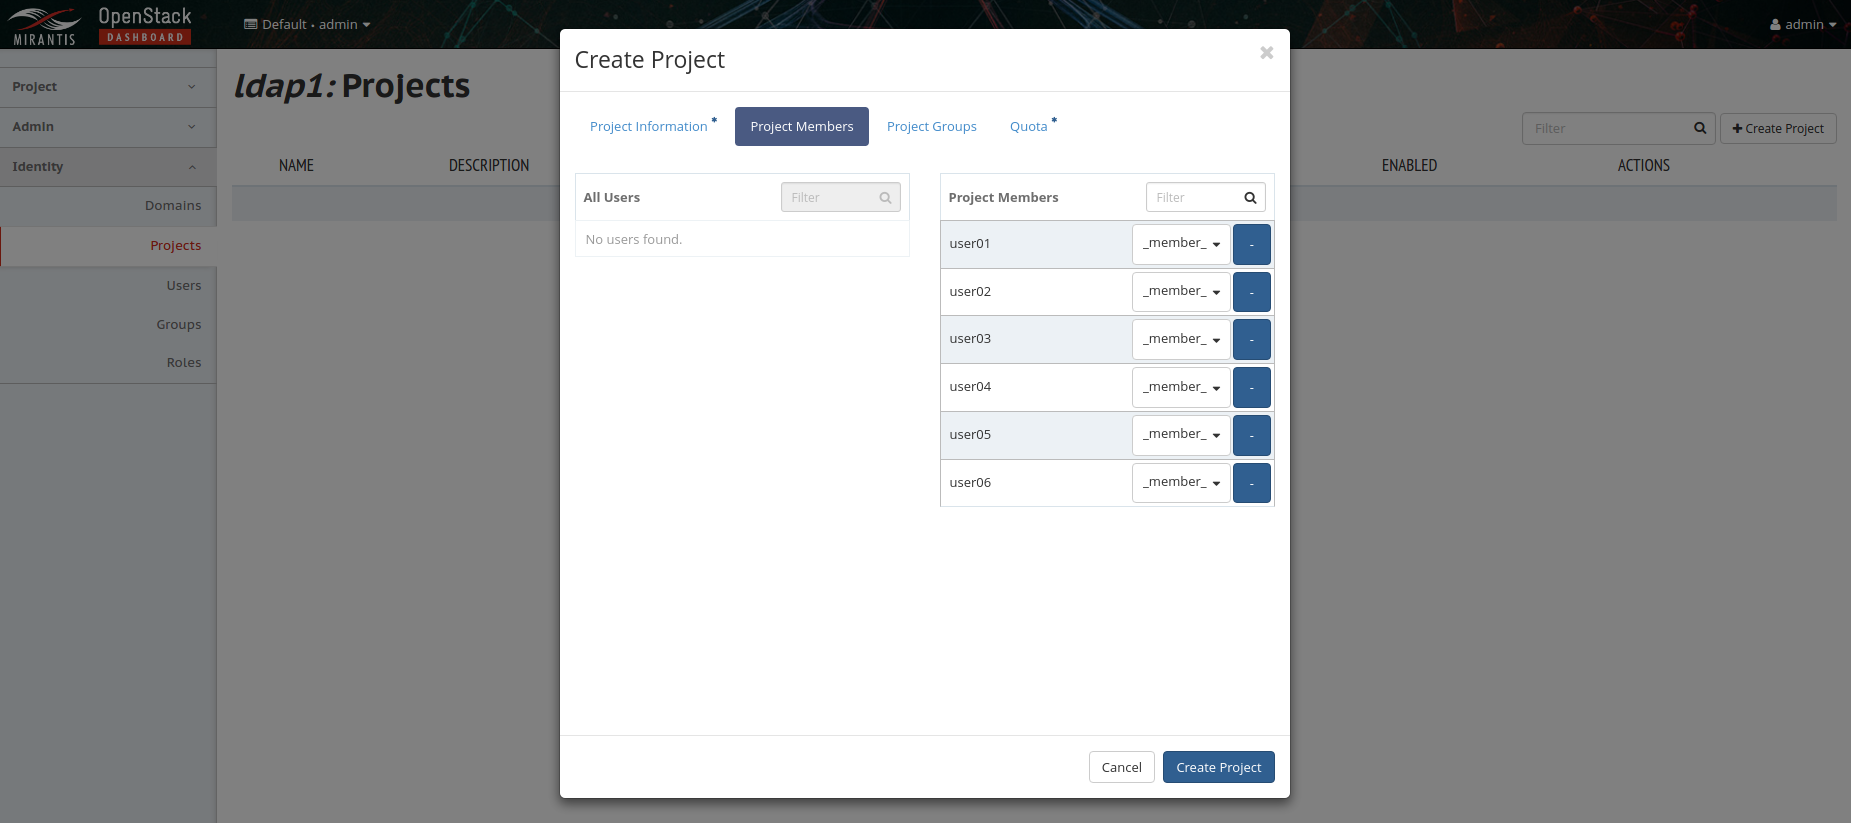
Go to Identity -> Projects and select 'Create Project' to create a new project for the domain and add user members to the project: