4.3 KiB
Xenserver Fuel Plugin User Guide
Once the Fuel XenServer plugin has been installed (following Installation Guide), you can create OpenStack environments that use XenServer as the underlying hypervisor
Prepare infrastructure
- Everyone will have different infrastructure requirements. The
additional requirements placed by XenServer are:
- Compute nodes must be run as a Virtual Machine, with one VM per XenServer hypervisor
- Ensure that the connectivity through to this virtual machine is the same as all other service nodes, as with standard Mirantis OpenStack setups
- An internal network is added by the instructions below, to provide communication between the host and the compute VM.
- Other service nodes (e.g. storage node) can also be created as virtual machines, but this is not required
- Download and install XenServer and HIMN tool, a XenServer plugin, as install guide mentioned. Use it for future VM creation and network configuration.
- While many networking setups are expected to work, the following setup is known to work:
- Physical machines with three ethernet devices:
- eth0 / “Access network”: Used to access the XenServer hosts and the Fuel Master’s web interface
- eth1 / “Control network”: OpenStack control plane (management and storage), the PXE network and the public network; all separated by VLAN tags. The public network is also on this network, and if a VLAN is required this is applied by the switch for untagged traffic.
- eth2 / “VLAN network”: This version of the plugin only supports VLAN segmentation for Neutron networking. This device carries all of the VLANs to be used by Neutron for VM traffic.
- One virtual network
- VLAN 'pxe' on eth1 / “PXE network”: Used for node bootstrapping.
4. To simplify the setup, the fuel master can also be installed on the XenServer hosts (so XenServer hosts can fully control the network setup), but this is not required. One example deployment is shown below.

Select Environment
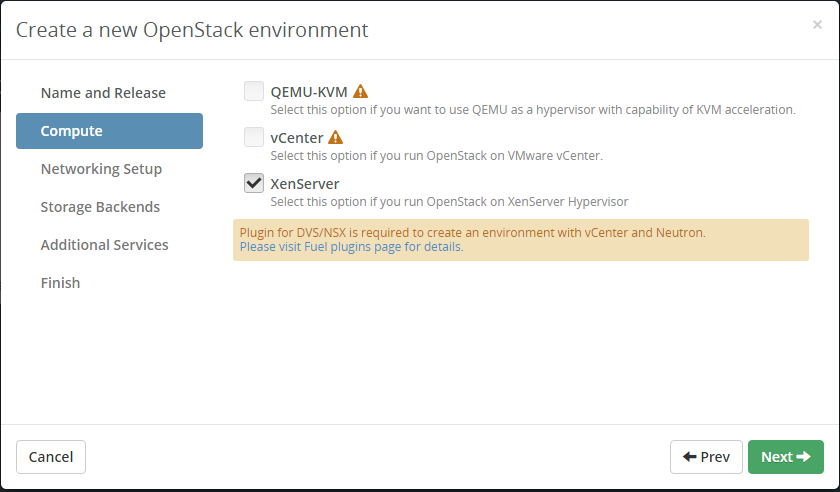
Create a new environment with the Fuel UI wizard. Select "Mitaka on Ubuntu 14.04" from OpenStack Release dropdown list, check off QEMU-KVM and check on XenServer. At the moment you will see most of options are disabled in the wizard.
Create new VMs in XenCenter for the compute nodes
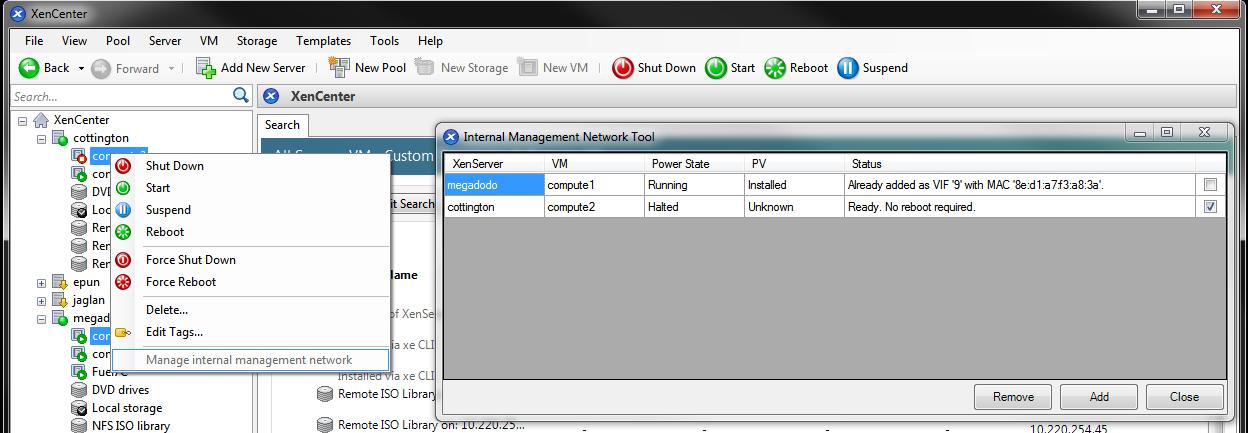
Select all Compute virtual Machines, Right click on one of the Virtual Machines and select "Manage internal management network"
Use the dialog to add the Host Internal Management Network to the compute virtual machines
Add new VMs to the new environment according to Fuel User Guide and configure them properly. A typical topology of 3 controller nodes + 3 compute nodes + 1 storage node is recommended.
Check the MAC address of the networks assigned in the "Interface Configuration" tab correspond to the correct physical or virtual interface. Note that no networks should be assigned to the HIMN interface on compute nodes, which will normally show as the last interface for these nodes.
Go to Settings tab and "Compute" section. You need to input the common access credentials to all XenServers that previously are used to create new VMs.
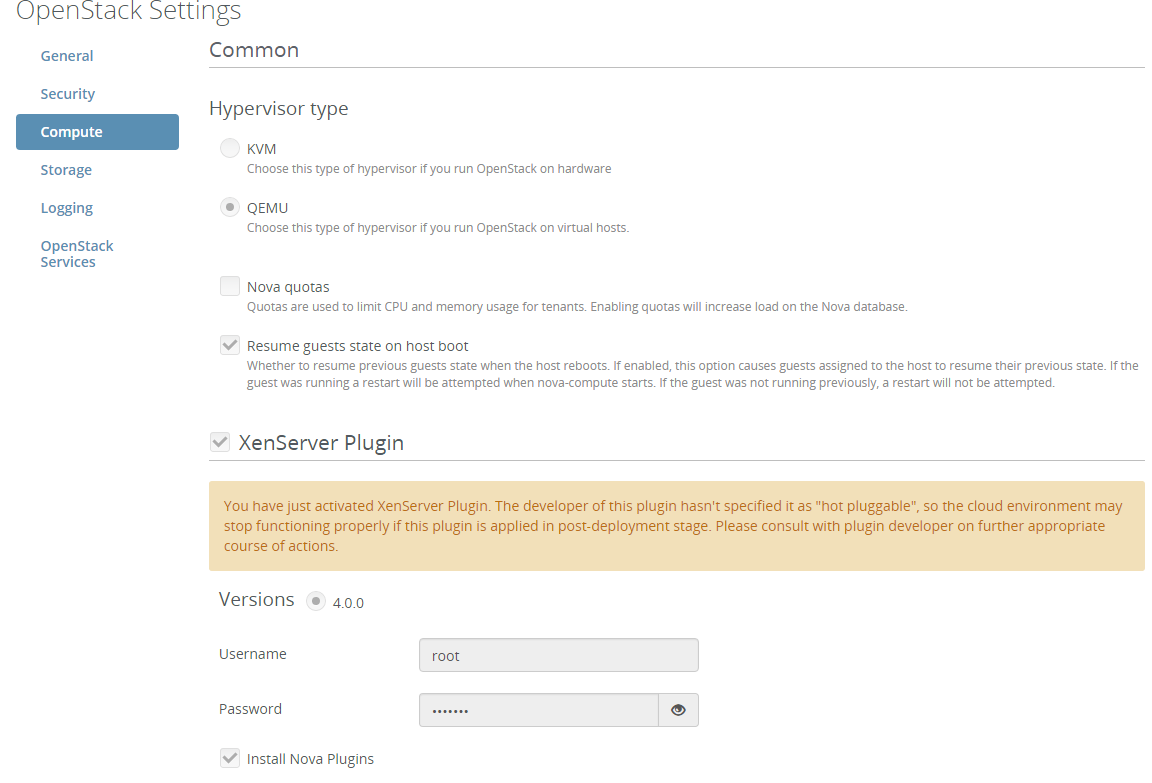
If the XenServer host already has compatible Nova plugins installed, untick the checkbox to install the supplemental packs. In normal cases, the XenServer host will not have compatible Nova plugins installed, so leave the checkbox enabled
Finish environment configuration
Press Deploy button to once you are done with environment configuration.
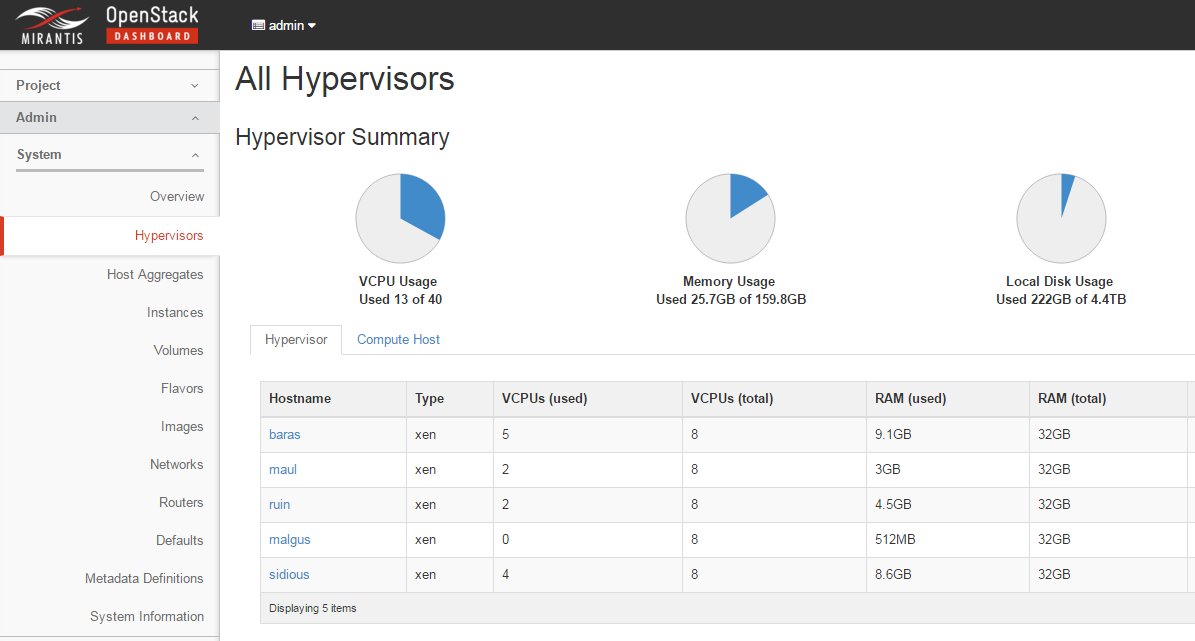
After deployment is done, you will see in Horizon that all hypervisors are xen.