After commit I49999d702f403d946084c5c4312d367404127b47
some names in dashboard were changed.
This patch replaces these names and related images in the docs.

Closes-Bug: #1583579

Depends-On: I8dea2cdf682ddd615a8dcc37154fc3d90df5c12b
Depends-On: I709308cf34dd8982e73422c26aad487a6068e24c

Change-Id: I3f0719e34c94594555cd5924f5ffd87692053b0a
4.2 KiB
Managing environments
An environment is a set of logically connected applications that are grouped together for an easy management. By default, each environment has a single network for all its applications, and the deployment of the environment is defined in a single heat stack. Applications in different environments are always independent from one another.
An environment is a single unit of deployment. This means that you deploy not an application but an environment that contains one or multiple applications.
Using OpenStack dashboard you can easily perform such actions with an environment as creating, editing, reviewing, deploying, and others.
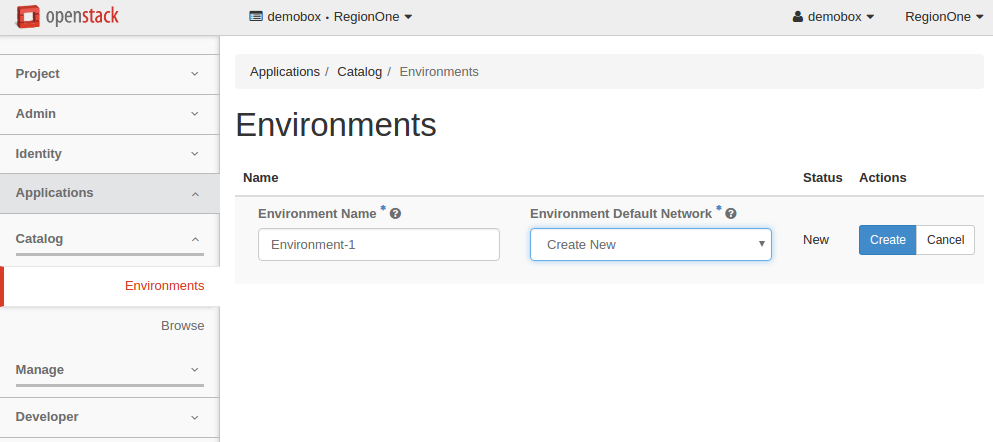
Create an environment
To create an environment, perform the following steps:
In OpenStack dashboard, navigate to Applications > Catalog > Environments.
On the
Environmentspage, click theAdd Newbutton.In the
Environment Namefield, enter the name for the new environment.From the
Environment Default Networkdrop-down list, choose a specific network, if necessary, or leave the defaultCreate Newoption to generate a new network.Click the rightmost
Createbutton. You will be redirected to the page with the environment components.
Alternatively, you can create an environment automatically using the
Quick Deploy
button below any application in the Application Catalog. For more
information, see: Quick deploy <from_cat>.
Edit an environment
You can edit the name of an environment. For this, perform the following steps:
- In OpenStack dashboard, navigate to Applications > Catalog > Environments.
- Position your mouse pointer over the environment name and click the appeared pencil icon.
- Edit the name of the environment.
- Click the tick icon to apply the change.
Review an environment
This section provides a general overview of an environment, its structure, possible statuses, and actions. An environment groups applications together. An application that is added to an environment is called a component.
To see an environment status, navigate to Applications > Catalog > Environments.
Environments may have one of the following statuses:
- Ready to configure. When the environment is new and contains no components.
- Ready to deploy. When the environment contains a component or multiple components and is ready for deployment.
- Ready. When the environment has been successfully deployed.
- Deploying. When the deploying is in progress.
- Deploy FAILURE. When the deployment finished with errors.
- Deleting. When deleting of an environment is in progress.
- Delete FAILURE. You can abandon the environment in this case.
Currently, the component status corresponds to the environment status.
To review an environment and its components, or reconfigure the
environment, click the name of an environment or simply click the
rightmost Manage Components button.
- On the
Componentstab you can: - On the
Topology,Deployment History, andLatest Deployment Logtabs of the environment page you can view the following:- The application topology of an environment. For more information,
see:
Application topology <application-topology>. - The log of a particular deployment. For more information, see:
Deployment history <depl-history>. - The information on the latest deployment of an environment. For more
information, see:
Latest deployment log <latest-log>.
- The application topology of an environment. For more information,
see:

