admin-manage-stacks.rst is dropped as we have no admin stack panel.
view-cloud-resources.rst is dropped as the metering panel was dropped
several releases ago.

Closes-Bug: 1714753

Change-Id: I483cb3dbaab23722abd2f321e8666d8beea2f7c7
2.6 KiB
Manage instances
As an administrative user, you can manage instances for users in various projects. You can view, terminate, edit, perform a soft or hard reboot, create a snapshot from, and migrate instances. You can also view the logs for instances or launch a VNC console for an instance.
For information about using the Dashboard to launch instances as an
end user, see the OpenStack End User Guide </user/launch-instances>.
Create instance snapshots
- Log in to the Dashboard and select the
adminproject from the drop-down list. - On the
Admintab, open theSystemtab and click theInstancescategory. - Select an instance to create a snapshot from it. From the Actions
drop-down list, select
Create Snapshot. - In the
Create Snapshotwindow, enter a name for the snapshot. - Click
Create Snapshot. The Dashboard shows the instance snapshot in theImagescategory. - To launch an instance from the snapshot, select the snapshot and
click
Launch. For information about launching instances, see theOpenStack End User Guide </user/launch-instances>.
Control the state of an instance
Log in to the Dashboard and select the
adminproject from the drop-down list.On the
Admintab, open theSystemtab and click theInstancescategory.Select the instance for which you want to change the state.
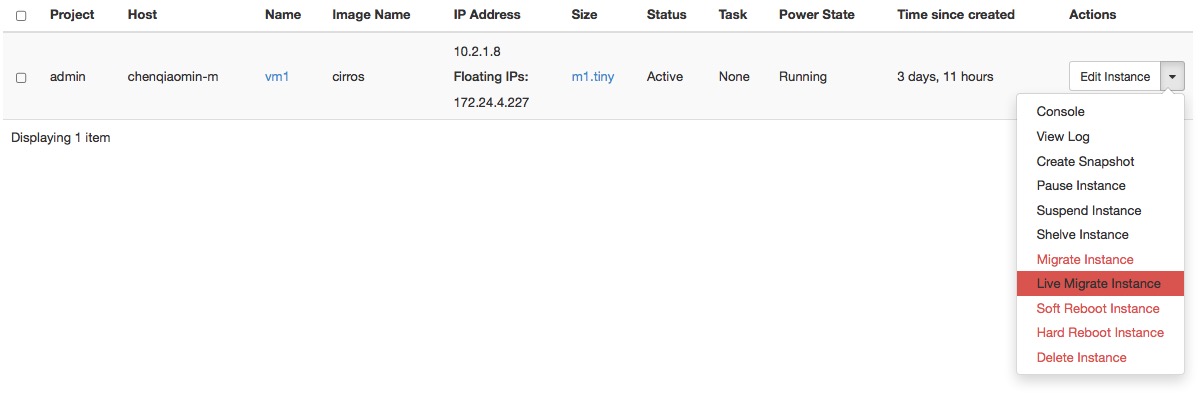
From the drop-down list in the Actions column, select the state.
Depending on the current state of the instance, you can perform various actions on the instance. For example, pause, un-pause, suspend, resume, soft or hard reboot, or terminate (actions in red are dangerous).

Track usage
Use the Overview category to track usage of instances for
each project.
You can track costs per month by showing meters like number of VCPUs, disks, RAM, and uptime of all your instances.
- Log in to the Dashboard and select the
adminproject from the drop-down list. - On the
Admintab, open theSystemtab and click theOverviewcategory. - Select a month and click
Submitto query the instance usage for that month. - Click
Download CSV Summaryto download a CSV summary.