16 KiB
Install and configure
This section describes how to install and configure the OpenStack Identity service, code-named keystone, on the controller node. For performance, this configuration deploys Fernet tokens and the Apache HTTP server to handle requests.
obs or rdo or ubuntu
Prerequisites
Before you configure the OpenStack Identity service, you must create a database and an administration token.
To create the database, complete the following actions:
Use the database access client to connect to the database server as the
rootuser:$ mysql -u root -pCreate the
keystonedatabase:CREATE DATABASE keystone;Grant proper access to the
keystonedatabase:GRANT ALL PRIVILEGES ON keystone.* TO 'keystone'@'localhost' \ IDENTIFIED BY 'KEYSTONE_DBPASS'; GRANT ALL PRIVILEGES ON keystone.* TO 'keystone'@'%' \ IDENTIFIED BY 'KEYSTONE_DBPASS';Replace
KEYSTONE_DBPASSwith a suitable password.Exit the database access client.
Generate a random value to use as the administration token during initial configuration:
$ openssl rand -hex 10
obs or rdo or ubuntu
Install and configure components
Note
This guide uses the Apache HTTP server with mod_wsgi to
serve Identity service requests on ports 5000 and 35357. By default, the
keystone service still listens on these ports. Therefore, this guide
manually disables the keystone service.
ubuntu
Disable the keystone service from starting automatically after installation:
# echo "manual" > /etc/init/keystone.overrideRun the following command to install the packages:
ubuntu
# apt-get install keystone apache2 libapache2-mod-wsgi
obs or rdo
Run the following command to install the packages:
rdo
# yum install openstack-keystone httpd mod_wsgiobs
# zypper install openstack-keystone apache2-mod_wsgi
obs or rdo or ubuntu
- Edit the
/etc/keystone/keystone.conffile and complete the following actions:In the
[DEFAULT]section, define the value of the initial administration token:[DEFAULT] ... admin_token = ADMIN_TOKENReplace
ADMIN_TOKENwith the random value that you generated in a previous step.In the
[database]section, configure database access:[database] ... connection = mysql+pymysql://keystone:KEYSTONE_DBPASS@controller/keystoneReplace
KEYSTONE_DBPASSwith the password you chose for the database.In the
[token]section, configure the Fernet token provider:[token] ... provider = fernet
rdo or ubuntu or obs
Populate the Identity service database:
# su -s /bin/sh -c "keystone-manage db_sync" keystoneNote
Ignore any deprecation messages in this output.
Initialize Fernet keys:
# keystone-manage fernet_setup --keystone-user keystone --keystone-group keystone
debian
Install and configure the components
Run the following command to install the packages:
# apt-get install keystoneRespond to prompts for debconf, which will fill the below database access directive.
[database] ... connection = mysql+pymysql://keystone:KEYSTONE_DBPASS@controller/keystoneIf you decide to not use
dbconfig-common, then you have to create the database and manage its access rights yourself, and run the following by hand.# keystone-manage db_syncGenerate a random value to use as the administration token during initial configuration:
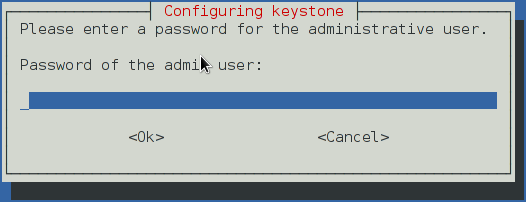
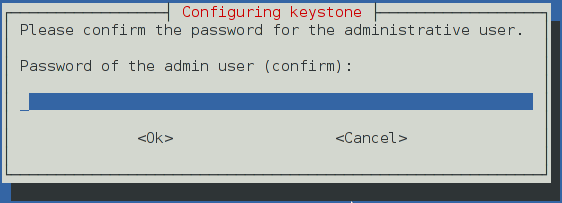
$ openssl rand -hex 10Configure the initial administration token:
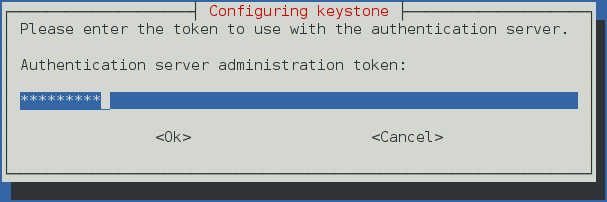
Use the random value that you generated in a previous step. If you install using non-interactive mode or you do not specify this token, the configuration tool generates a random value.
Later on, the package will configure the below directive with the value you entered:
[DEFAULT] ... admin_token = ADMIN_TOKENCreate the
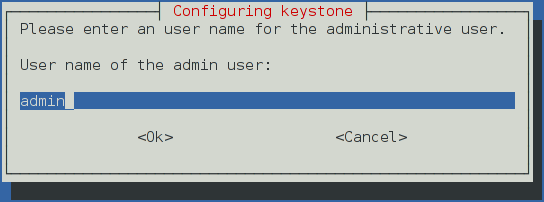
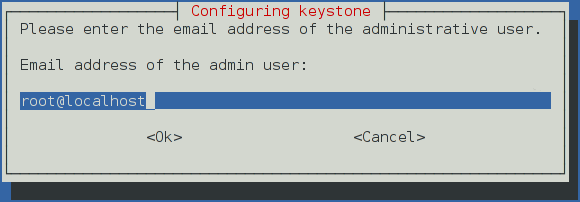
adminproject and user:During the final stage of the package installation, it is possible to automatically create an
adminandserviceproject, and anadminuser. This can later be used for other OpenStack services to contact the Identity service. This is the equivalent of running the below commands:# openstack --os-token ${AUTH_TOKEN} \ --os-url=http://127.0.0.1:35357/v3/ \ --os-domain-name default \ --os-identity-api-version=3 \ project create --or-show \ admin --domain default \ --description "Default Debian admin project" # openstack --os-token ${AUTH_TOKEN} \ --os-url=http://127.0.0.1:35357/v3/ \ --os-domain-name default \ --os-identity-api-version=3 \ project create --or-show \ service --domain default \ --description "Default Debian admin project" # openstack --os-token ${AUTH_TOKEN} \ --os-url=http://127.0.0.1:35357/v3/ \ --os-domain-name default \ --os-identity-api-version=3 \ user create --or-show \ --password ADMIN_PASS \ --project admin \ --email root@localhost \ --enable \ admin \ --domain default \ --description "Default Debian admin user" # openstack --os-token ${AUTH_TOKEN} \ --os-url=http://127.0.0.1:35357/v3/ \ --os-domain-name default \ --os-identity-api-version=3 \ role create --or-show admin # openstack --os-token ${AUTH_TOKEN} \ --os-url=http://127.0.0.1:35357/v3/ \ --os-domain-name default \ --os-identity-api-version=3 \ role add --project admin --user admin admin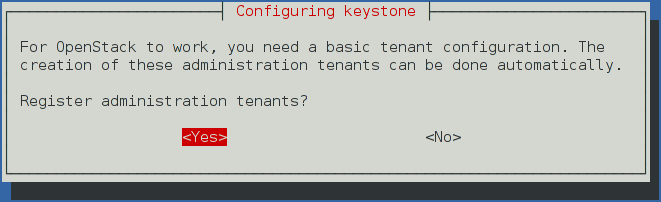
In Debian, the Keystone package offers automatic registration of Keystone in the service catalogue. This is equivalent of running the below commands:
# openstack --os-token ${AUTH_TOKEN} \
  --os-url=http://127.0.0.1:35357/v3/ \
  --os-domain-name default \
  --os-identity-api-version=3 \
  service create \
  --name keystone \
  --description "OpenStack Identity" \
  identity

# openstack --os-token ${AUTH_TOKEN} \
  --os-url=http://127.0.0.1:35357/v3/ \
  --os-domain-name default \
  --os-identity-api-version=3 \
  keystone public http://controller:5000/v2.0

# openstack --os-token ${AUTH_TOKEN} \
  --os-url=http://127.0.0.1:35357/v3/ \
  --os-domain-name default \
  --os-identity-api-version=3 \
  keystone internal http://controller:5000/v2.0

# openstack --os-token ${AUTH_TOKEN} \
  --os-url=http://127.0.0.1:35357/v3/ \
  --os-domain-name default \
  --os-identity-api-version=3 \
  keystone admin http://controller:35357/v2.0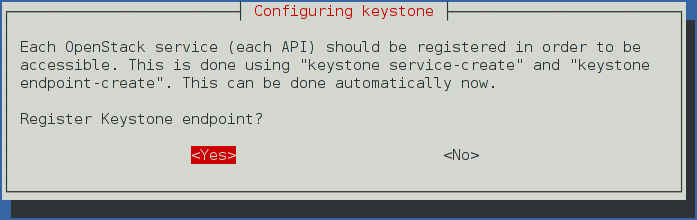
obs or rdo or ubuntu
Configure the Apache HTTP server
rdo
Edit the
/etc/httpd/conf/httpd.conffile and configure theServerNameoption to reference the controller node:ServerName controllerCreate the
/etc/httpd/conf.d/wsgi-keystone.conffile with the following content:Listen 5000 Listen 35357 <VirtualHost *:5000> WSGIDaemonProcess keystone-public processes=5 threads=1 user=keystone group=keystone display-name=%{GROUP} WSGIProcessGroup keystone-public WSGIScriptAlias / /usr/bin/keystone-wsgi-public WSGIApplicationGroup %{GLOBAL} WSGIPassAuthorization On ErrorLogFormat "%{cu}t %M" ErrorLog /var/log/httpd/keystone-error.log CustomLog /var/log/httpd/keystone-access.log combined <Directory /usr/bin> Require all granted </Directory> </VirtualHost> <VirtualHost *:35357> WSGIDaemonProcess keystone-admin processes=5 threads=1 user=keystone group=keystone display-name=%{GROUP} WSGIProcessGroup keystone-admin WSGIScriptAlias / /usr/bin/keystone-wsgi-admin WSGIApplicationGroup %{GLOBAL} WSGIPassAuthorization On ErrorLogFormat "%{cu}t %M" ErrorLog /var/log/httpd/keystone-error.log CustomLog /var/log/httpd/keystone-access.log combined <Directory /usr/bin> Require all granted </Directory> </VirtualHost>
ubuntu
Edit the
/etc/apache2/apache2.conffile and configure theServerNameoption to reference the controller node:ServerName controllerCreate the
/etc/apache2/sites-available/wsgi-keystone.conffile with the following content:Listen 5000 Listen 35357 <VirtualHost *:5000> WSGIDaemonProcess keystone-public processes=5 threads=1 user=keystone group=keystone display-name=%{GROUP} WSGIProcessGroup keystone-public WSGIScriptAlias / /usr/bin/keystone-wsgi-public WSGIApplicationGroup %{GLOBAL} WSGIPassAuthorization On ErrorLogFormat "%{cu}t %M" ErrorLog /var/log/apache2/keystone.log CustomLog /var/log/apache2/keystone_access.log combined <Directory /usr/bin> Require all granted </Directory> </VirtualHost> <VirtualHost *:35357> WSGIDaemonProcess keystone-admin processes=5 threads=1 user=keystone group=keystone display-name=%{GROUP} WSGIProcessGroup keystone-admin WSGIScriptAlias / /usr/bin/keystone-wsgi-admin WSGIApplicationGroup %{GLOBAL} WSGIPassAuthorization On ErrorLogFormat "%{cu}t %M" ErrorLog /var/log/apache2/keystone.log CustomLog /var/log/apache2/keystone_access.log combined <Directory /usr/bin> Require all granted </Directory> </VirtualHost>Enable the Identity service virtual hosts:
# ln -s /etc/apache2/sites-available/wsgi-keystone.conf /etc/apache2/sites-enabled
obs
Edit the
/etc/sysconfig/apache2file and configure theAPACHE_SERVERNAMEoption to reference the controller node:APACHE_SERVERNAME="controller"Create the
/etc/apache2/conf.d/wsgi-keystone.conffile with the following content:Listen 5000 Listen 35357 <VirtualHost *:5000> WSGIDaemonProcess keystone-public processes=5 threads=1 user=keystone group=keystone display-name=%{GROUP} WSGIProcessGroup keystone-public WSGIScriptAlias / /usr/bin/keystone-wsgi-public WSGIApplicationGroup %{GLOBAL} WSGIPassAuthorization On ErrorLogFormat "%{cu}t %M" ErrorLog /var/log/apache2/keystone.log CustomLog /var/log/apache2/keystone_access.log combined <Directory /usr/bin> Require all granted </Directory> </VirtualHost> <VirtualHost *:35357> WSGIDaemonProcess keystone-admin processes=5 threads=1 user=keystone group=keystone display-name=%{GROUP} WSGIProcessGroup keystone-admin WSGIScriptAlias / /usr/bin/keystone-wsgi-admin WSGIApplicationGroup %{GLOBAL} WSGIPassAuthorization On ErrorLogFormat "%{cu}t %M" ErrorLog /var/log/apache2/keystone.log CustomLog /var/log/apache2/keystone_access.log combined <Directory /usr/bin> Require all granted </Directory> </VirtualHost>Recursively change the ownership of the
/etc/keystonedirectory:# chown -R keystone:keystone /etc/keystone
ubuntu or rdo or obs
Finalize the installation
ubuntu
Restart the Apache HTTP server:
# service apache2 restartBy default, the Ubuntu packages create an SQLite database.
Because this configuration uses an SQL database server, you can remove the SQLite database file:
# rm -f /var/lib/keystone/keystone.db
rdo
Start the Apache HTTP service and configure it to start when the system boots:
# systemctl enable httpd.service
# systemctl start httpd.service
obs
Start the Apache HTTP service and configure it to start when the system boots:
# systemctl enable apache2.service
# systemctl start apache2.service