5.0 KiB
Installation Guide
Prerequisites
This guide assumes that you have installed Fuel and all the nodes of your future environment are discovered and functional. Note, the 6WIND virtual accelerator Fuel plugin will download virtual accelerator packages from a remote repository. Make sure that nodes can correctly reach Internet.
To correctly deploy the 6WIND virtual accelerator Fuel plugin you will need a credentials package (in base64 format).
If you have already purchased 6WIND software you should have this package, otherwise contact 6WIND support team. On the other hand, if you just want to evaluate the 6WIND virtual accelerator you still need to contact 6WIND.
Requirements
This plugin is intended to be installed on nodes running Fuel 7.0 (version 7.0.0) Verify this typing the following command: :
fuel --versionIn order to correctly install the 6WIND virtual accelerator plugin on Fuel compute(s) the following requirements are mandatory:
- Use KVM as hypervisor virtualization driver
- Deploy on compute node(s) with at least 4GB of RAM and 2 cpus
- Internet connectivity on Master node (since the plugin will download software from 6WIND remote repositories)
- A dedicated link for Neutron networking tunnels between Compute and Network
This version of plugin supports only VLAN as networking tunneling option. It is mandatory to use a dedicated physical network interface for your tunnel instead of the default Fuel setup that puts this interface on the same used for pxe and management. Support for VxLAN and for bridged VLAN will be available in future releases.
The 6WIND virtual accelerator needs qemu and libvirt supporting vhostuser and multiqueue features to correclty run its fast packet processing stack. In particular on the compute nodes the following packages are needed:
- libvirt-bin (1.3.1-1ubuntu6)
- qemu (2.5+dfsg-5ubuntu6)
Note that Mirantis official repositories do not provide these packages. For this reason the default behavior for the plugin is to retrieve the 6WIND libvirt and qemu packages and replace the Mirantis ones in the early stages of deployment.
Installing 6WIND virtual accelerator Plugin
Download 6WIND virtual accelerator plugin from the Fuel Plugins Catalog.
Copy the downloaded rpm to the Fuel Master node: :
scp 6wind-virtual-accelerator-1.0-1.0.3-1.noarch.rpm <Fuel Master node ip>:/tmp/Log into the Fuel Master node and install the plugin :
ssh <the Fuel Master node ip>
fuel plugins --install /tmp/6wind-virtual-accelerator-1.0-1.0.3-1.noarch.rpm
Now verify that the plugin is correctly installed :
fuel plugins
3  | 6wind-virtual-accelerator | 1.0.3   | 3.0.0
Configuring 6WIND virtual accelerator Plugin
First you have to create environment in Fuel Web UI.
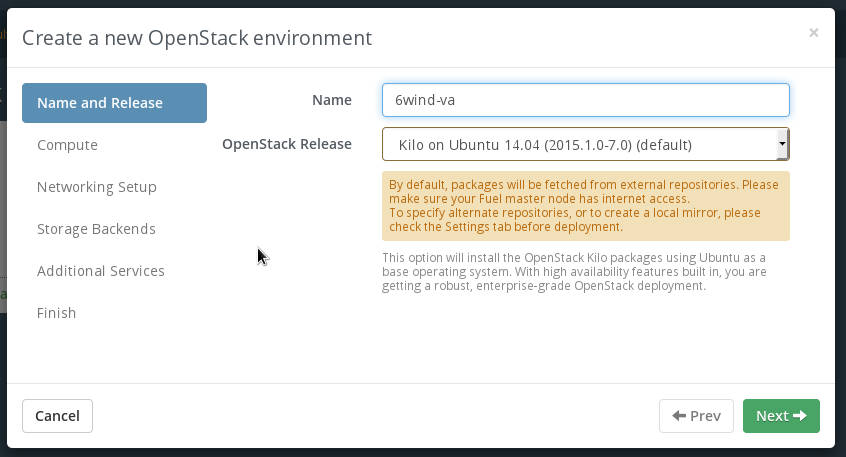
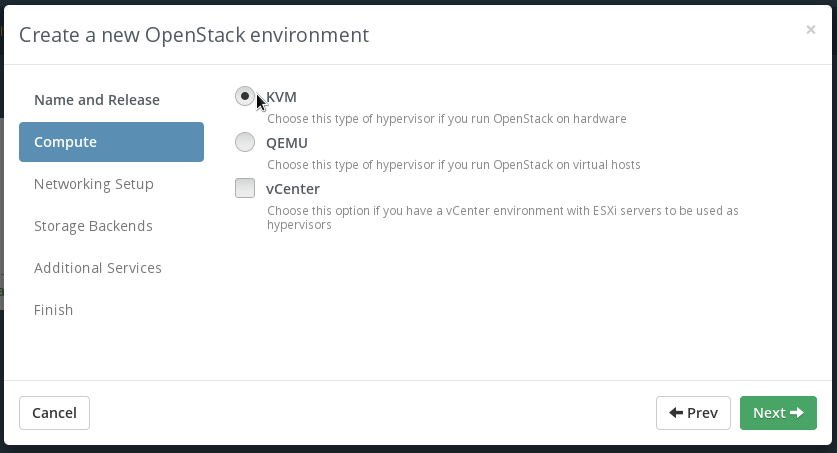
Please select KVM hypervisor type for your environment.
Please select Neutron networking. The 6WIND virtual accelerator supports only VLAN segmentation.

Activate the plugin in the Fuel Web UI Settings tab

Configure fields with correct values:
- Provide base64 credentials package you received from 6WIND support team
- Refer to next chapter for detailed field description and configuration. In particular if you have a license file you should upload it at this time in the Advanced Paramaters menu.
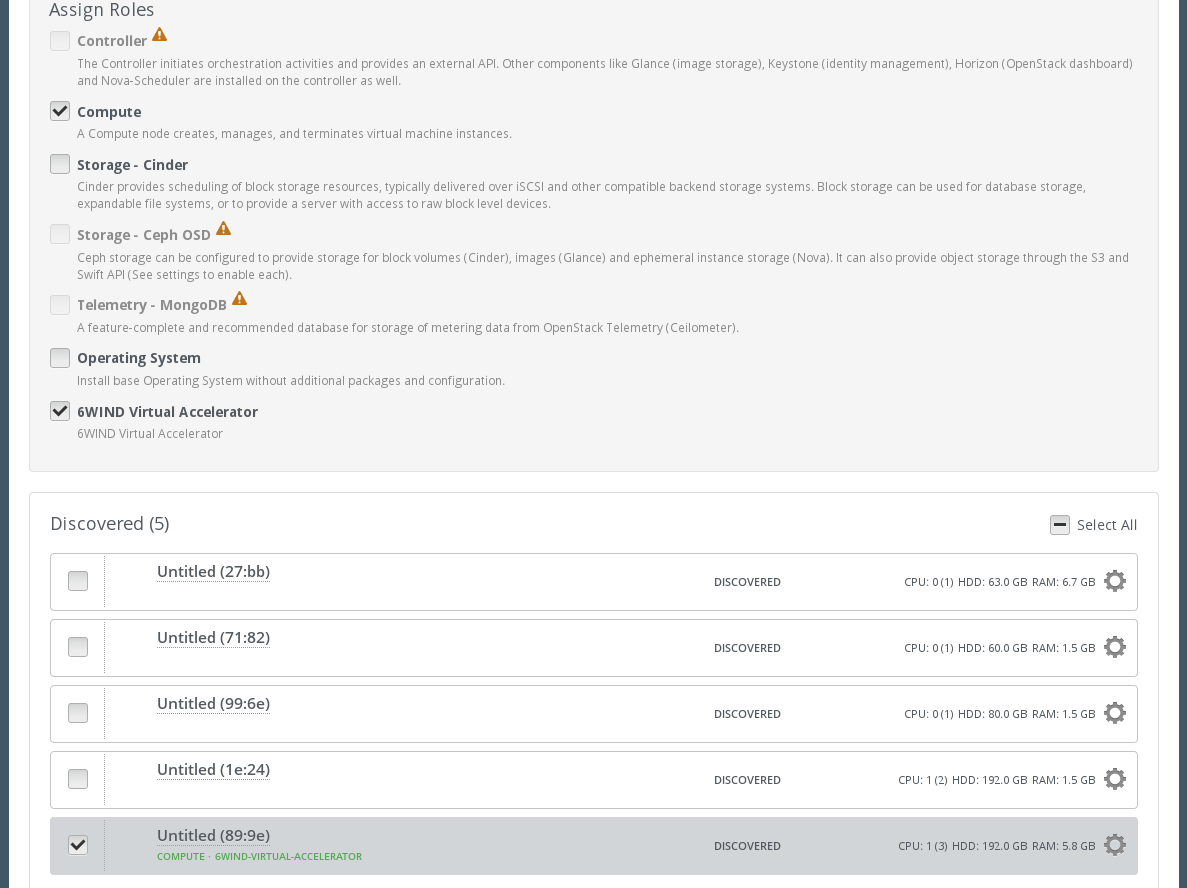
Add nodes and assign them the following roles:
- At least 1 Controller
- At least one node with both Compute and 6WIND Virtual Accelerator roles. Make sure that the chosen node has at least 2 cpus and 4 GB of RAM
Configure nodes to use a dedicated link for Neutron networking.
- Select the Compute and 6WIND Virtual Accelerator node and configre its interfaces.
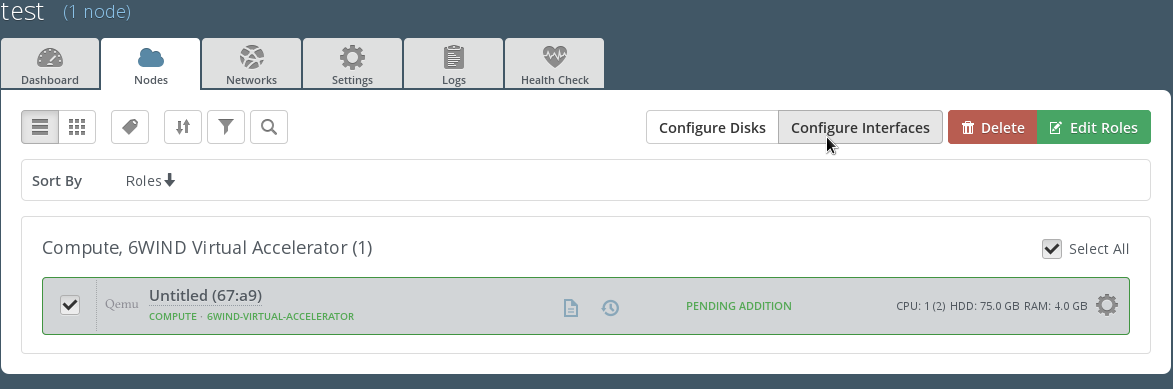
- Drag the Private interface to the dedicated NIC used to connect to Controller.

- Perform these two steps for the Controller node too and choose the NIC accordingly.
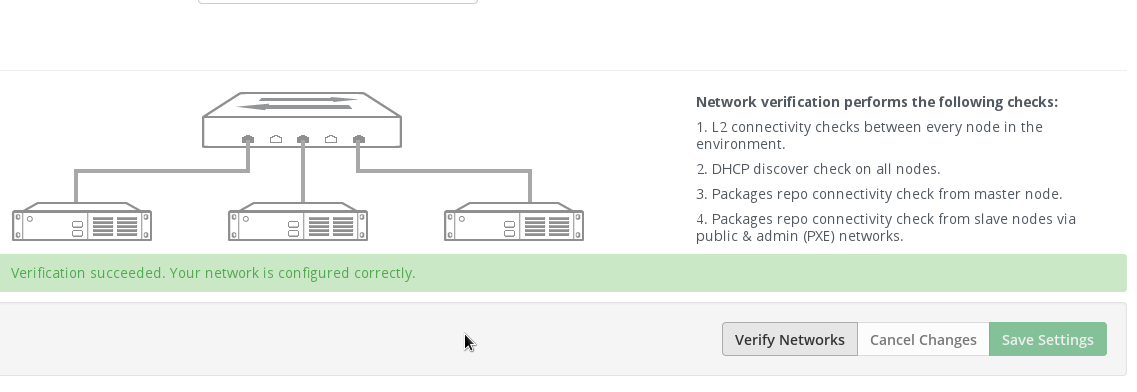
Verify nodes network connectivity (in the Fuel Web UI Network tab)
Press Deploy changes to deploy the environment <https://docs.mirantis.com/openstack/fuel/fuel-7.0/user-guide.html# deploy-changes>.