12 KiB
Guide to the Calico Plugin for Fuel ver 2.0
Calico Plugin
Calico provides seamless, scalable, secure Layer 3 Virtual Networking for your Mirantis OpenStack Deployment.
By replacing OpenStack's native networking model, Calico provides efficient, easy to troubleshoot networking, without the complexity and inefficiency of overlay networking models. Calico does not require any additional nodes or Calico specific management - it just works, and gets out of your way!
More details can be found at http://docs.projectcalico.org/en/latest/.
This version of the Calico plugin supports HA - specifically OpenStack deployments with multiple controller nodes, where OpenStack API requests are load-balanced across those nodes.
Requirements
This Calico plugin is compatible with Mirantis OpenStack 7.0.
The minimal sensible deployment for a Fuel/Calico cluster is one controller node and two compute hosts. For OpenStack API request load-balancing and HA you can add further controllers, and obviously more compute nodes for further compute capacity. (As an illustration of possible scaling, Project Calico's own testing - although not using the Fuel deployment technology - has included up to 500 compute nodes and 10 controller nodes.)
Limitations
This plugin only supports an Ubuntu OpenStack setup (as does Mirantis OpenStack 7.0).
Installation Guide
To install the Calico plugin, follow these steps:
Prepare a clean Fuel Master node, as described by the Mirantis documentation.
Download the Calico plugin from the Fuel Plugin Catalog.
Copy the plugin onto the Fuel Master node:
scp calico-fuel-plugin-2.0-2.0.2-1.noarch.rpm root@<Fuel_Master_Node_IP>:/tmpLog into the Fuel Master Node:
ssh root@<Fuel_Master_Node_IP>Install the plugin:
cd /tmp
fuel plugins --install calico-fuel-plugin-2.0-2.0.2-1.noarch.rpm
Check the plugin was installed correctly by running:
fuel plugins --listThe expected output is:
[root@fuel-master tmp]# fuel plugins --list
id | name               | version | package_version
---|--------------------|---------|----------------
1  | calico-fuel-plugin | 2.0.2   | 3.0.0
User Guide
Deploying Mirantis OpenStack with Calico Networking
Use the Fuel web UI to deploy an OpenStack cluster, observing the following guidelines:
Create a new OpenStack environment, selecting "Neutron with VLAN segmentation" as the networking setup
Other options can be left as their defaults.
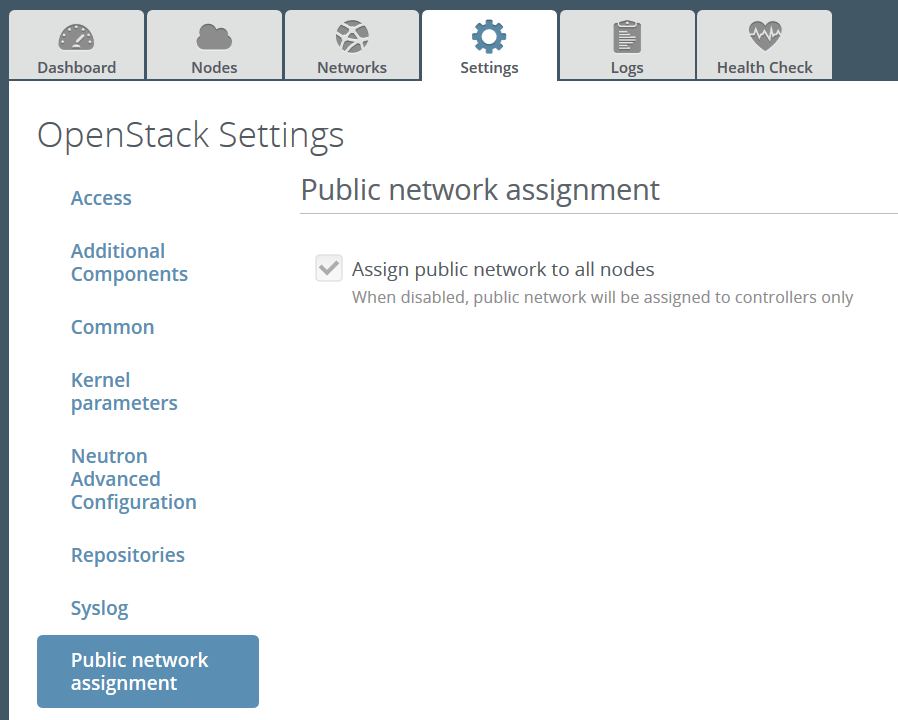
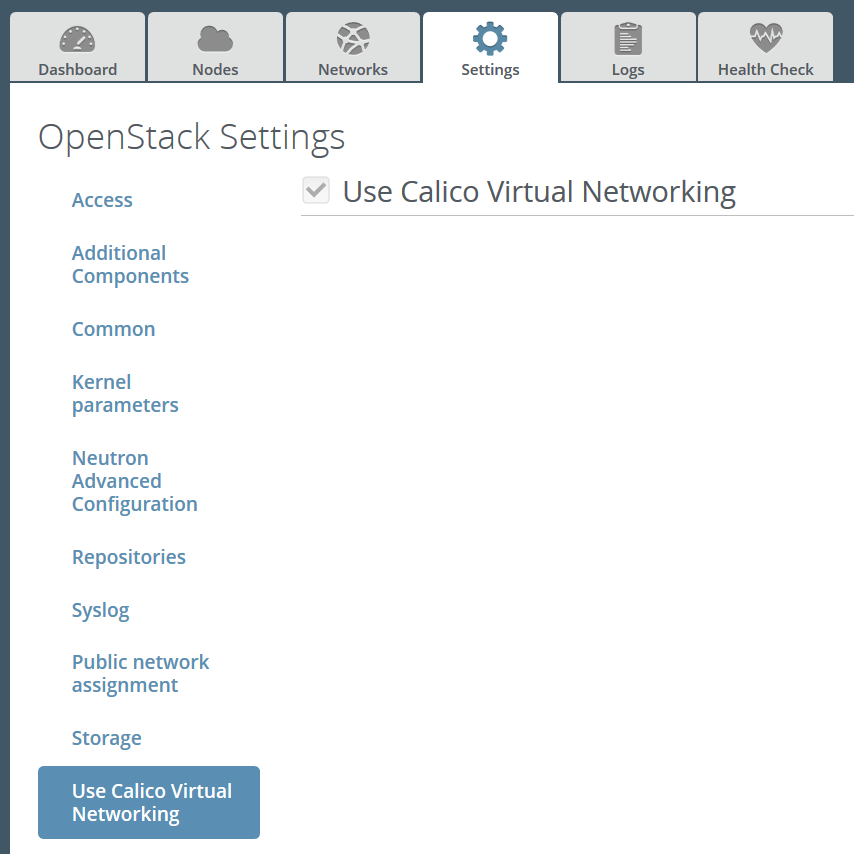
Under the Settings tab, make sure the following options are checked and then save your changes:
- "Assign public network to all nodes"
Calico uses IP routing between compute hosts to transport data between VMs, and between VMs and the outside world. Therefore every compute host must have a routable IP address.
- alt
-
Screenshot: "Assign public network to all nodes"
- "Use Calico Virtual Networking"
- alt
-
Screenshot: "Use Calico Virtual Networking"
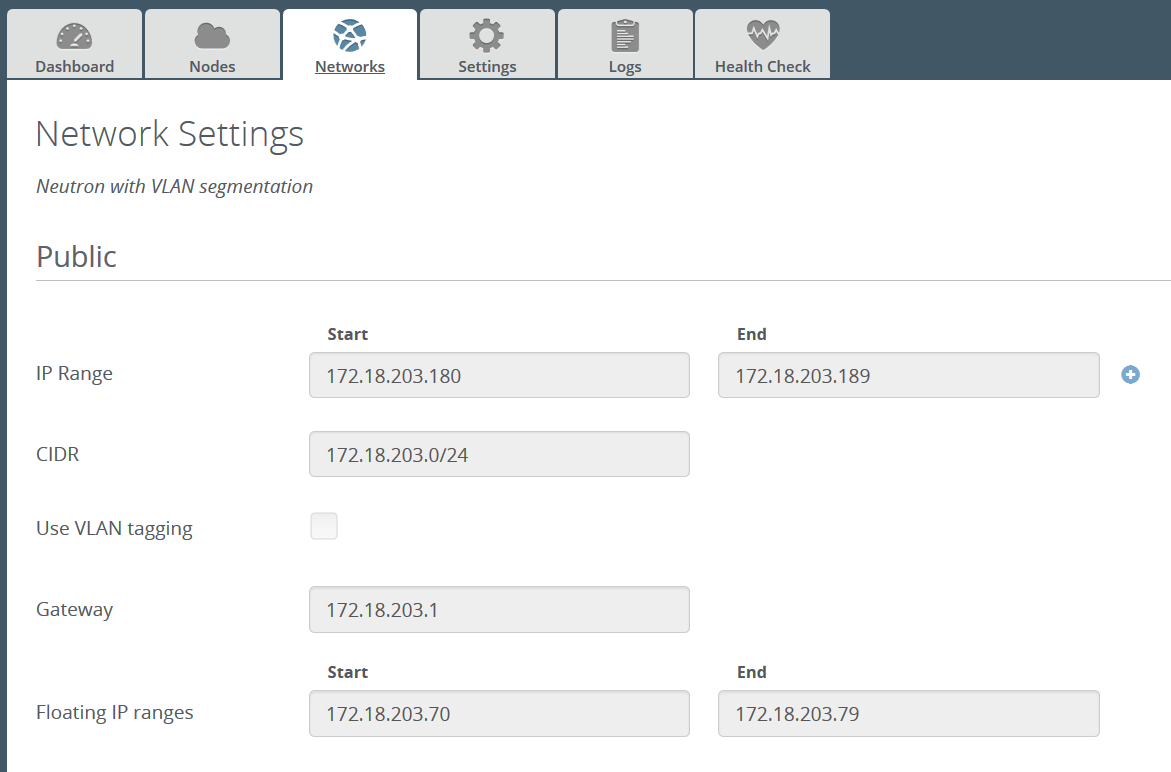
Under the Networks tab, configure the 'Public' settings (these will need to be set to sensible values for your network setup):
- IP Range
- CIDR
- Use VLAN tagging: No
- Gateway
- Floating IP range
All of the other network settings should be left with their default values. Ensure you save your changes once you are finished.
Example network configuration:
Click the 'Verify Networks' button at the bottom of the screen, to check the network configuration.
Under the Nodes tab, add some nodes (for meaningful testing, you will need at least two compute nodes and one controller).
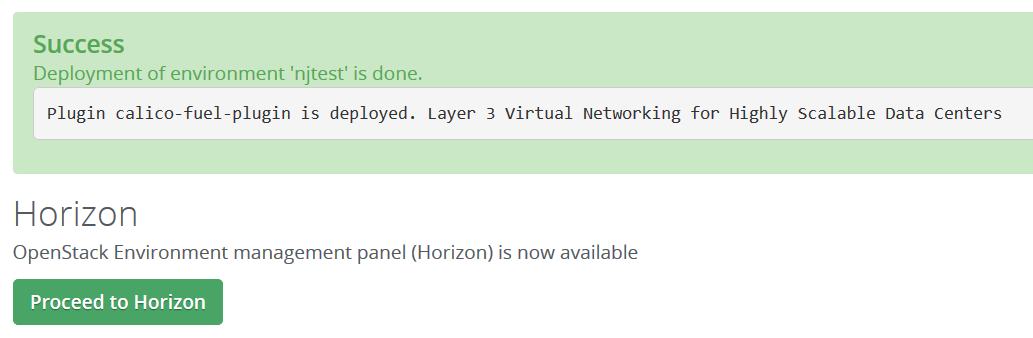
Deploy changes.
Verify that Calico networking is operating correctly in the new deployment, by following the 'Demonstration Setup' section below.
Using your Calico networked Mirantis OpenStack deployment
You are now ready to use the OpenStack dashboard to configure your deployment. Your particular requirements will determine how you use your OpenStack deployment, but you may wish to refer to the Calico documentation for some common next steps.
Demonstration Setup
The following is a demonstration OpenStack setup that, if wished, can be followed to verify the Calico elements of your OpenStack deployment are operating as intended.
In this example, we will launch a number of VMs (load balanced across the compute hosts), split into two security groups - with VMs in the same security group able to contact each other, but not VMs in the other security group (regardless of which compute host the VMs are on).
Steps:
Follow the link from the Fuel web UI to the OpenStack dashboard:
Under Project->Network->Networks in the OpenStack dashboard, create a network and subnet from which instance IP addresses will be allocated.
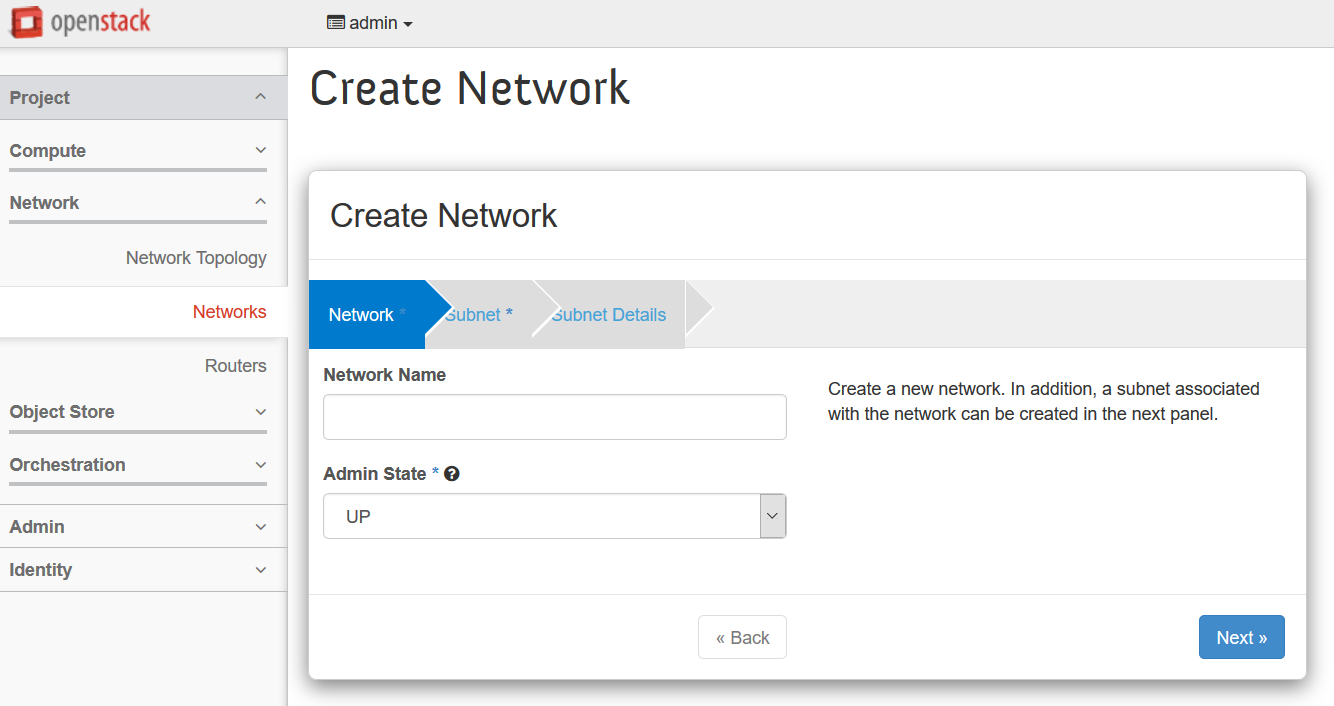
Use the following settings:
- Network:
- Name: demo
- Admin State: UP
- Subnet:
- Create Subnet: Yes
- Name: demo_subnet
- Network Address: 10.65.0.0/24
- IP Version: IPv4
- Gateway IP: 10.65.0.1
- Subnet Detail:
- Enable DHCP: Yes
- Network:
Under Project->Compute->Access&Security in the OpenStack dashboard, create two new security groups, named 'sg1' and 'sg2', and both with description 'test'.
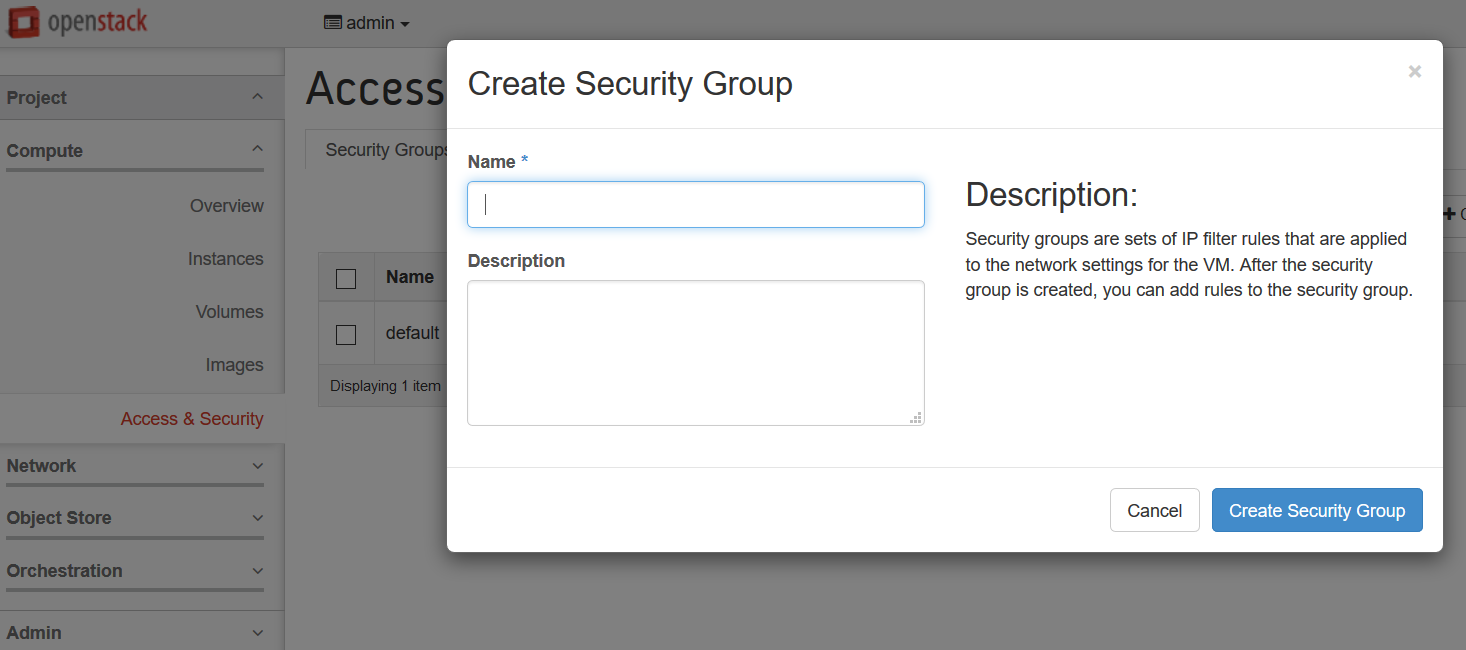
For each security group, select 'Manage Rules' and add two new rules.
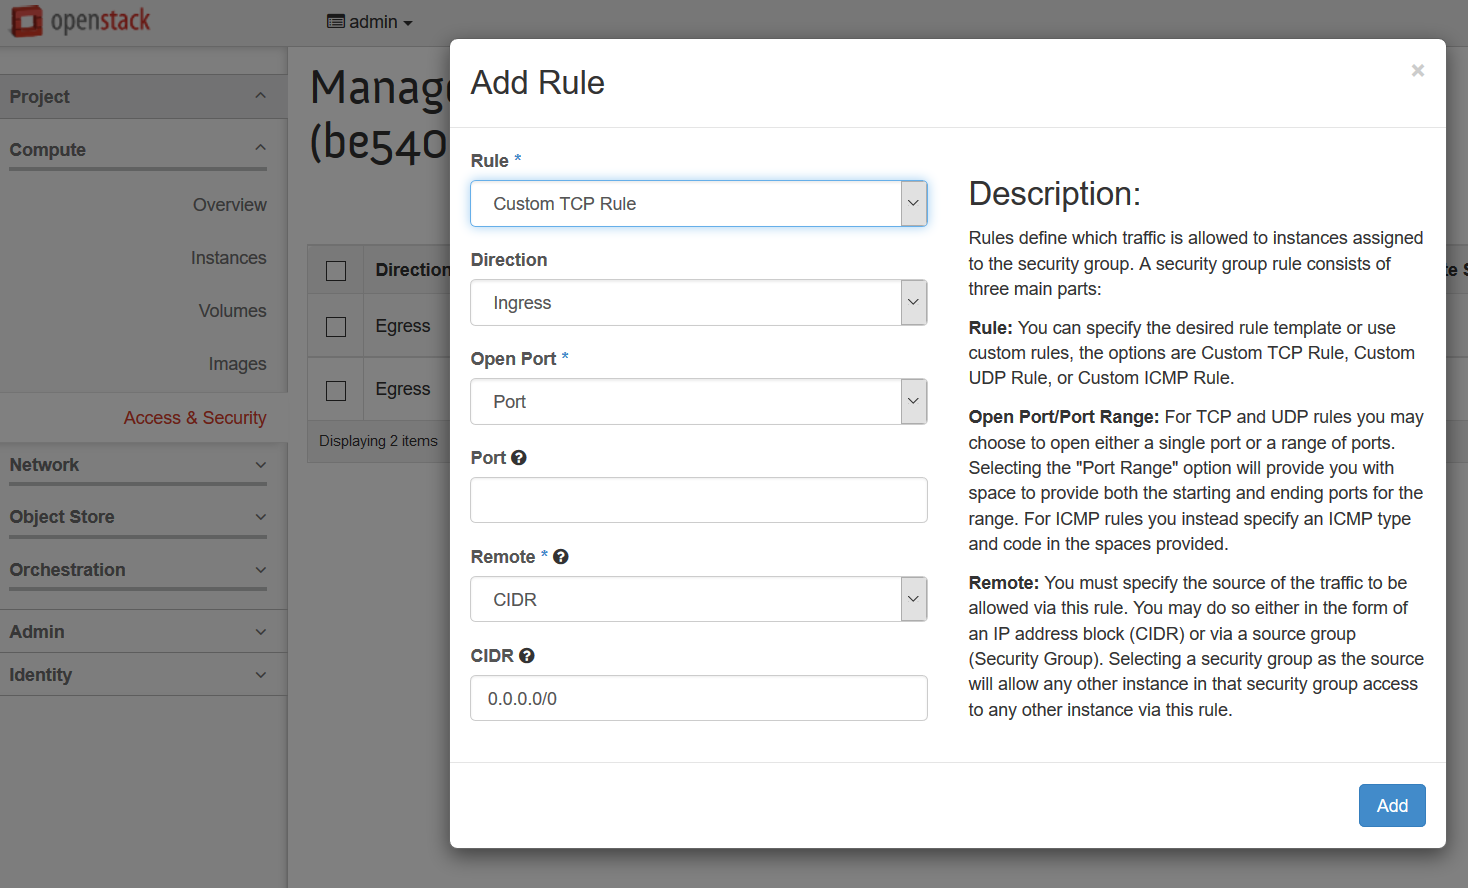
Use the following settings:
- First Rule:
- Rule: ALL ICMP
- Direction: Ingress
- Remote: Security Group
- Security Group: <whichever of sg1/sg2 is followed by '(current)'>
- Ether Type: IPv4
- Second Rule:
- Rule: SSH
- Remote: CIDR
- CIDR: 0.0.0.0/0
- First Rule:
Under Project->Compute->Instances in the OpenStack dashboard, launch several instances.
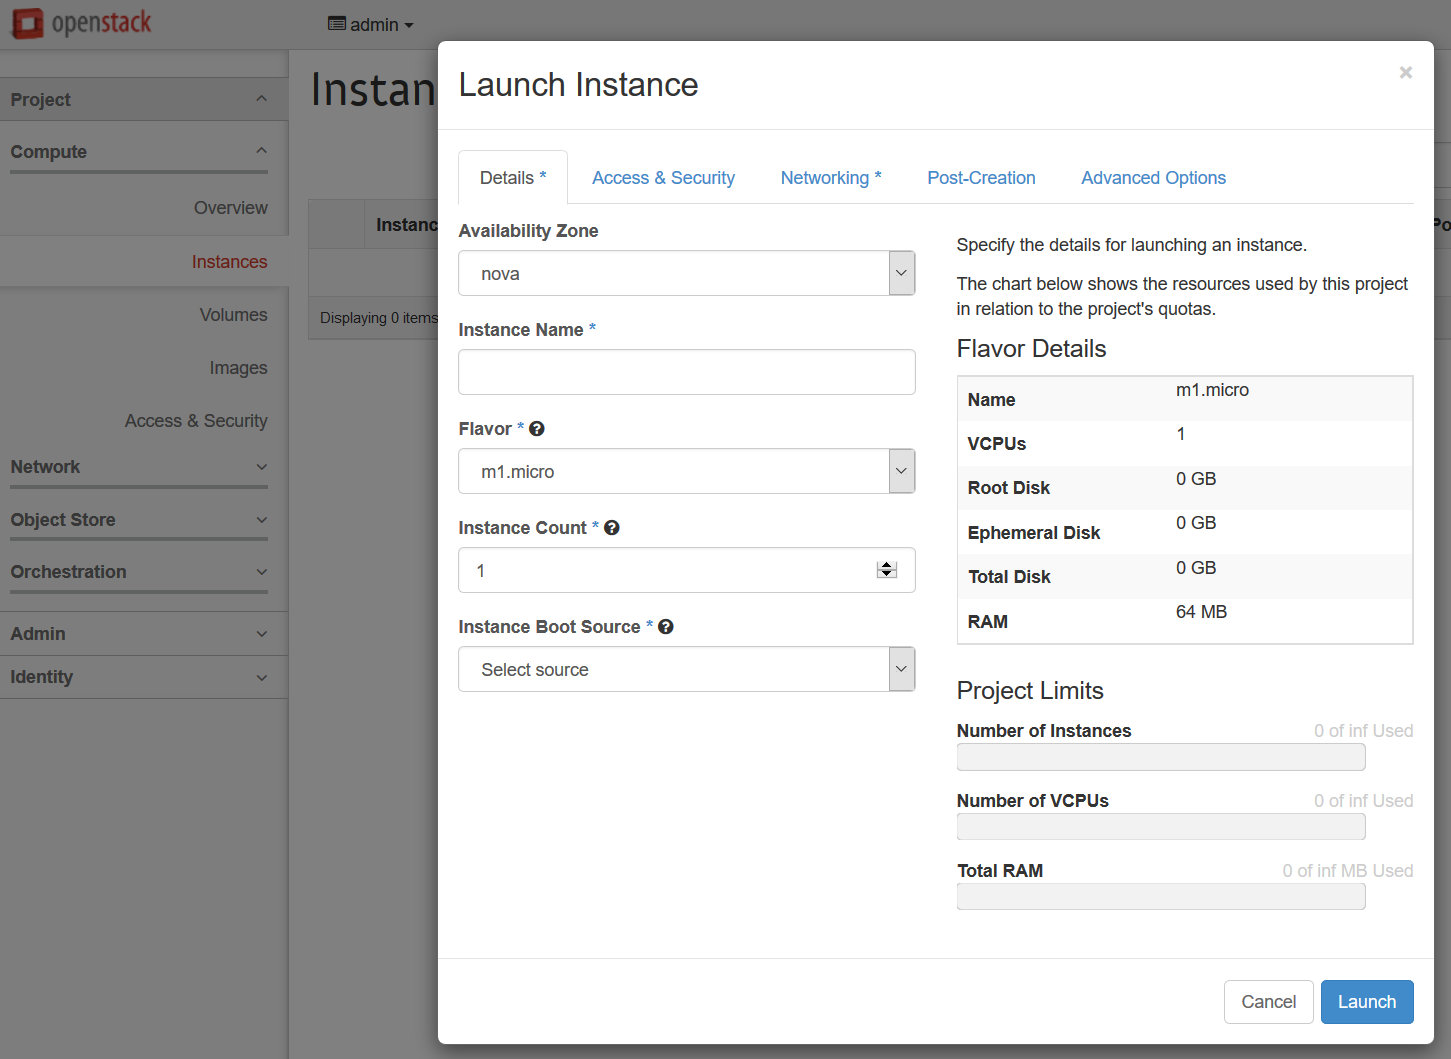
Use the following settings:
- Flavor: m1.tiny
- Instance Boot Source: Boot from Image
- Image Name: TestVM
- Under the Access & Security tab, select one of sg1/sg2 (split your instances roughly 50:50 between the two security groups).
- Under the Networking tab, drag 'demo' into the 'Selected Networks' box.
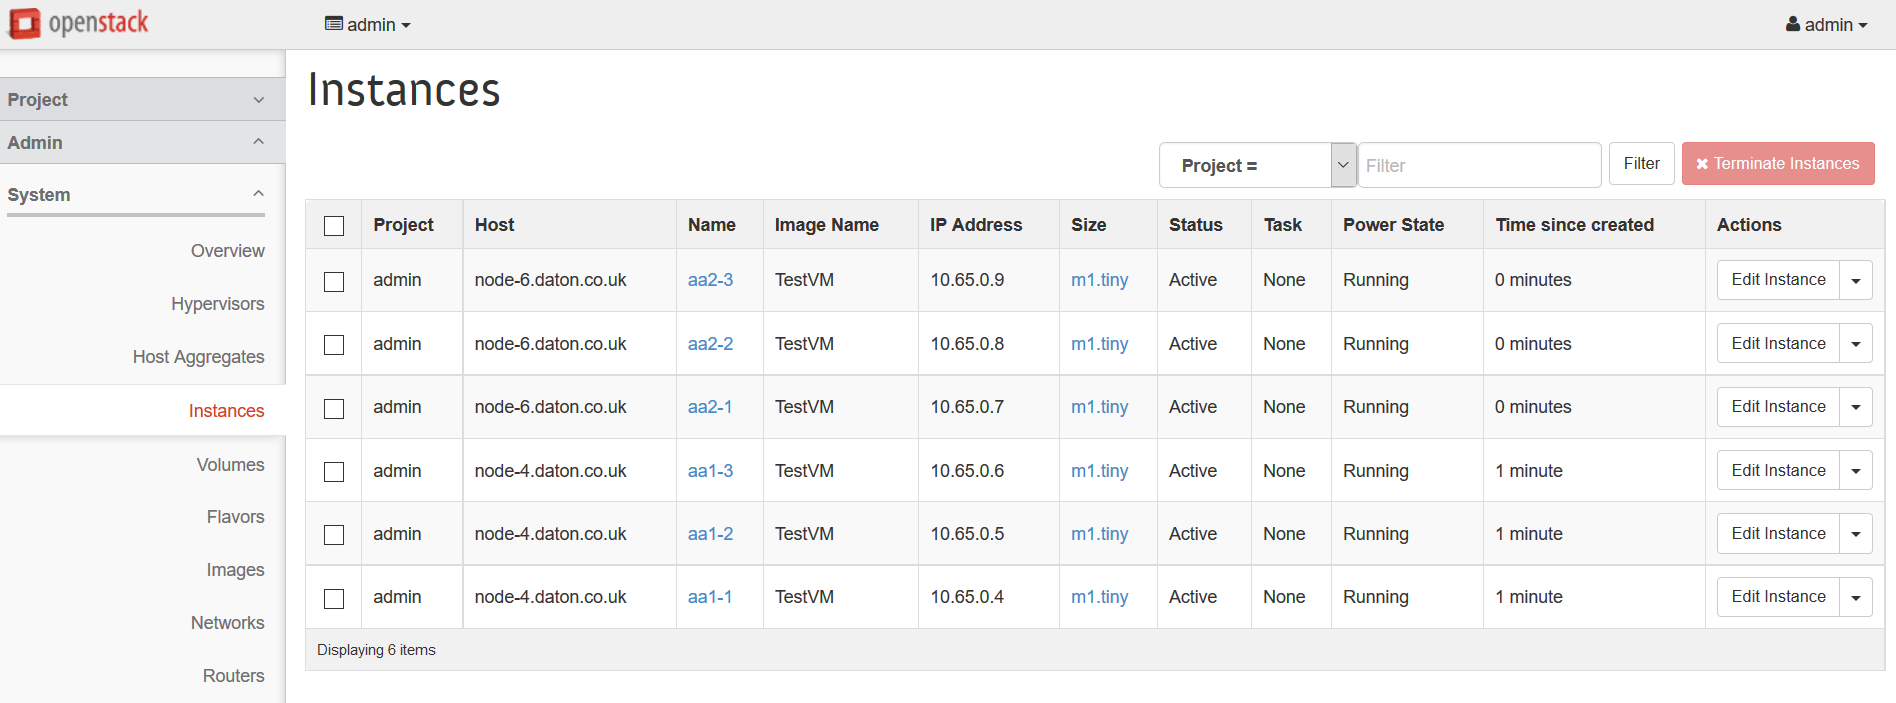
Under Admin->Instances in the OpenStack dashboard, verify that:
- the requested instances have been launched
- they are distributed roughly evenly across the compute hosts
- they have each been assigned an IP address from the range that you configured above (e.g. 10.65.0.0/24)
- they reach Active status within about a minute.
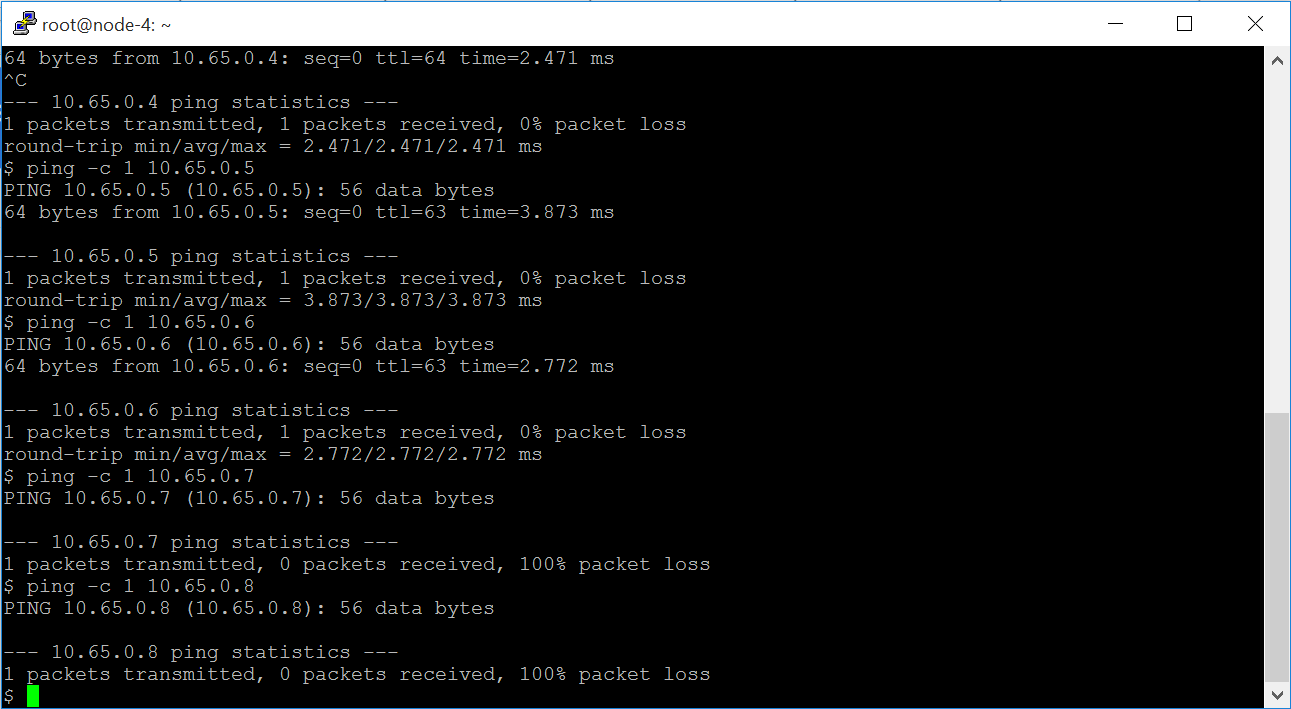
Open a console on one of the instances. You should find that you can ping the other instances in the same security group, but not the instances in the other security group.
Frequently Asked Questions
How do I setup instances with internet access?
For outbound access, you need to ensure that your VMs can send traffic to your border gateway router (typically this will be the case, because usually your compute hosts will be able to do so). The border gateway can then perform SNAT.
For inbound connections, you need assign a publically routable IP address to your VM - that is, attach it to a network with a public IP address. You will also need to make sure that your border router (and any intermediate routers between the border router and the compute host) can route to that address too. The simplest way to do that is to peer the border router with the route reflector on the control host.
The Calico documentation has an overview of addressing and connectivity.
On the controller, BIRD lists routes to my instances listed as unreachable - is that a problem?
No, this is expected. On the control node, BIRD is acting as a route reflector, so won't write routes into the Linux forwarding table. Hence these routes are unreachable from the control node. That's ok though - they are reachable from the compute hosts, and therefore from the instances themselves.
Why do instances in different networks have connectivity?
With Calico networking, any two networks will have connectivity, unless you have specifically disabled it using security groups. This is different to standard OpenStack networking - you can find more information in the Calico Neutron API documentation.
Appendix
General Calico docs can be found at http://docs.projectcalico.org/en/latest/.
The official Calico website is at http://www.projectcalico.org/.
The Calico code base lives at https://github.com/projectcalico/calico.
Revision history
| Version | Revision date | Editor | Comment |
| 0.1 | 04.30.2015 | Brook Roberts (brook@projectcalico.org) | Created the document. |
| 0.2 | 05.07.2015 | Emma Gordon (emma@projectcalico.org) | Review markups from Mirantis feedback. |
| 0.3 | 03.08.2015 | Emma Gordon (emma@projectcalico.org) | Updated link to calico repository on GitHub. |
| 0.4 | 02.10.2016 | Neil Jerram (neil@projectcalico.org) | First RST version, for plugin version 2.0. |
| 0.5 | 04.21.2016 | Neil Jerram (neil@projectcalico.org) | Review markups from Mirantis feedback. |