6.6 KiB
Installation Guide
Prerequisites
This guide assumes that you have installed Fuel and all the nodes of your future environment are discovered and functional.
Install Contrail Plugin
To install the Contrail plugin:
Download the Contrail plugin from the Fuel Plugins Catalog.
Copy the rpm package downloaded at the previous step to the Fuel Master node and install the plugin :
scp contrail-5.1-5.1.0-1.noarch.rpm <Fuel Master node ip>:/tmp/Log into the Fuel Master node and install the plugin :
ssh <the Fuel Master node ip>
fuel plugins --install contrail-5.1-5.1.0-1.noarch.rpm
You should get the following output :
Plugin <plugin-name-version>.rpm was successfully installedCopy the Juniper Contrail installation package to the Fuel Master node and run the installation script to unpack the vendor package and populate the plugin repository:
Note
You can obtain the Juniper Contrail installation package from Juniper by subscription. More information can be found on the official Juniper Contrail web-site.
scp contrail-install-packages_3.2.0.0-19~mitaka_all.deb \
<Fuel Master node ip>:/var/www/nailgun/plugins/contrail-5.1/
ssh <Fuel Master node ip> /var/www/nailgun/plugins/contrail-5.1/install.sh
In case if vmware integration expected, before running install.sh copy vcenter plugin package to contrail plugin folder :
scp contrail-install-vcenter-plugin_3.2.0.0-19_all.deb \
<Fuel Master node ip>:/var/www/nailgun/plugins/contrail-5.1/
Configure Contrail Plugin
To configure the Contrail plugin, follow the steps below:
Create environment in Fuel web UI.
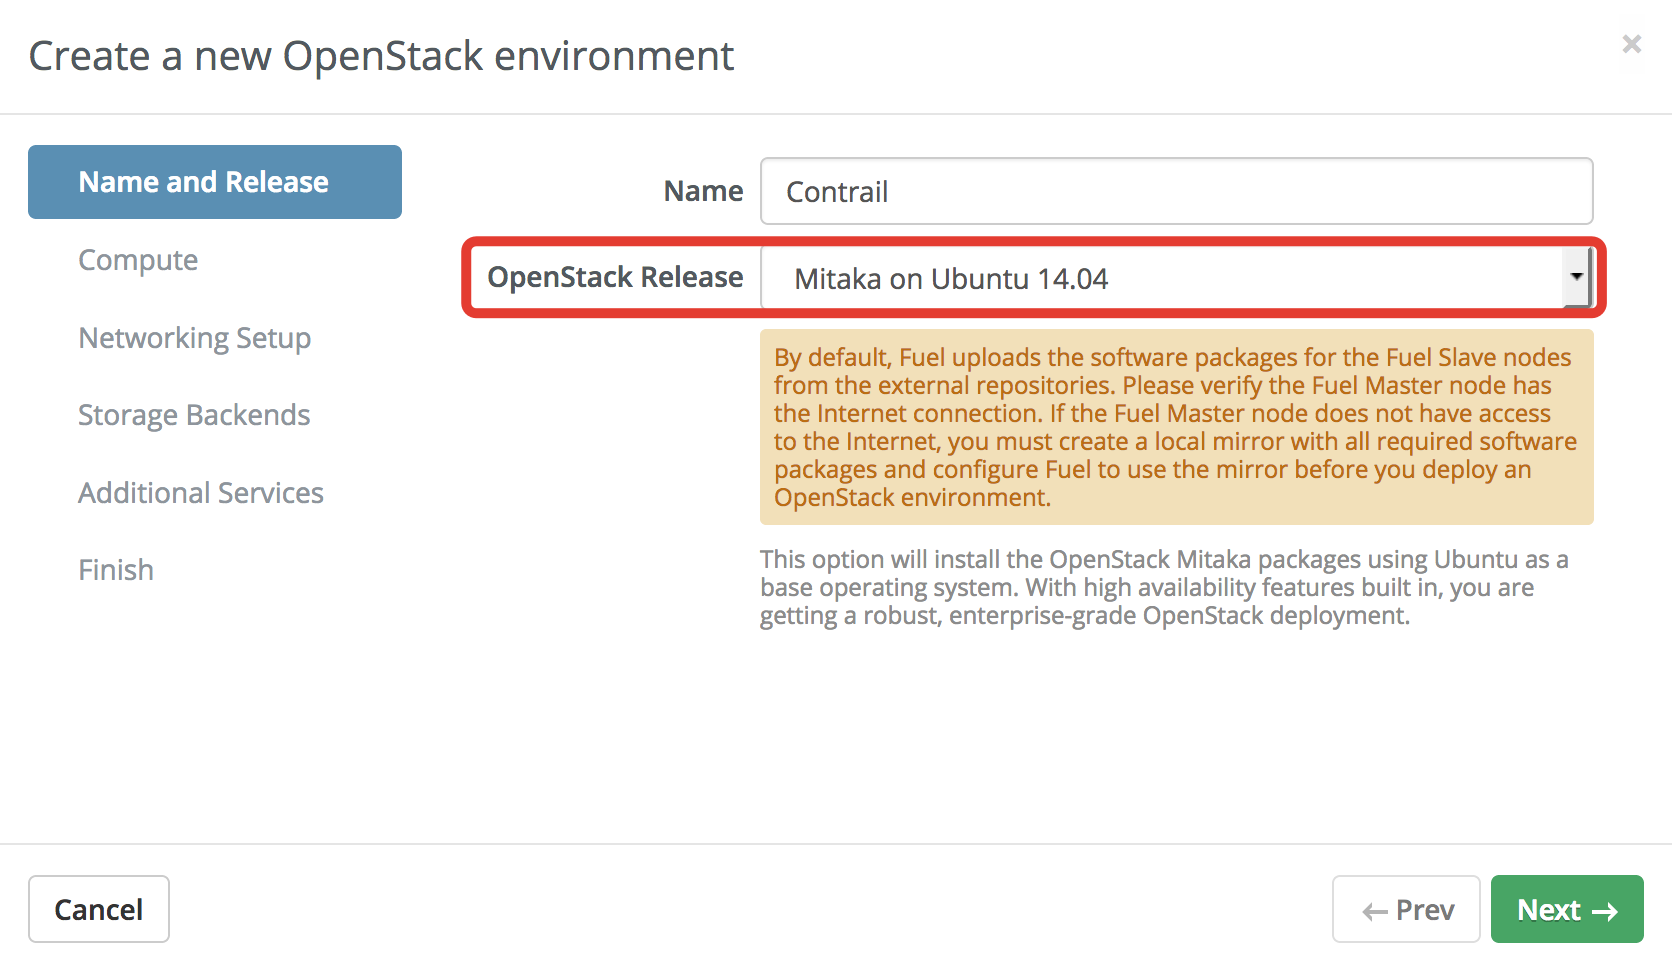
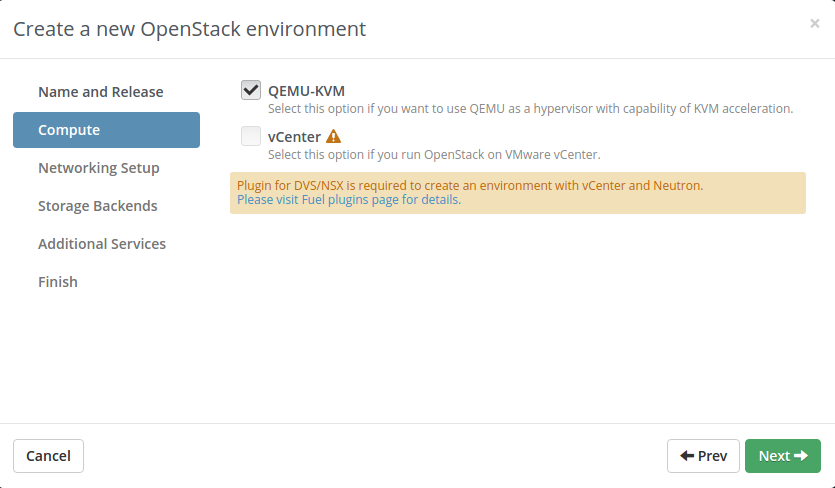
Please select KVM or QEMU hypervisor type for your environment also enable "vCenter" feature if vmware integration expected
Please select Contrail SDN networking setup.

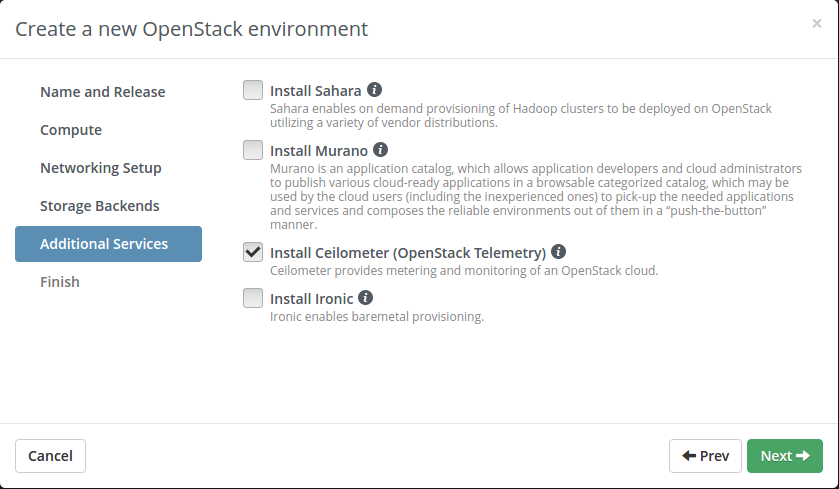
If you plan to use Heat orchestration with autoscaling, install Ceilometer.
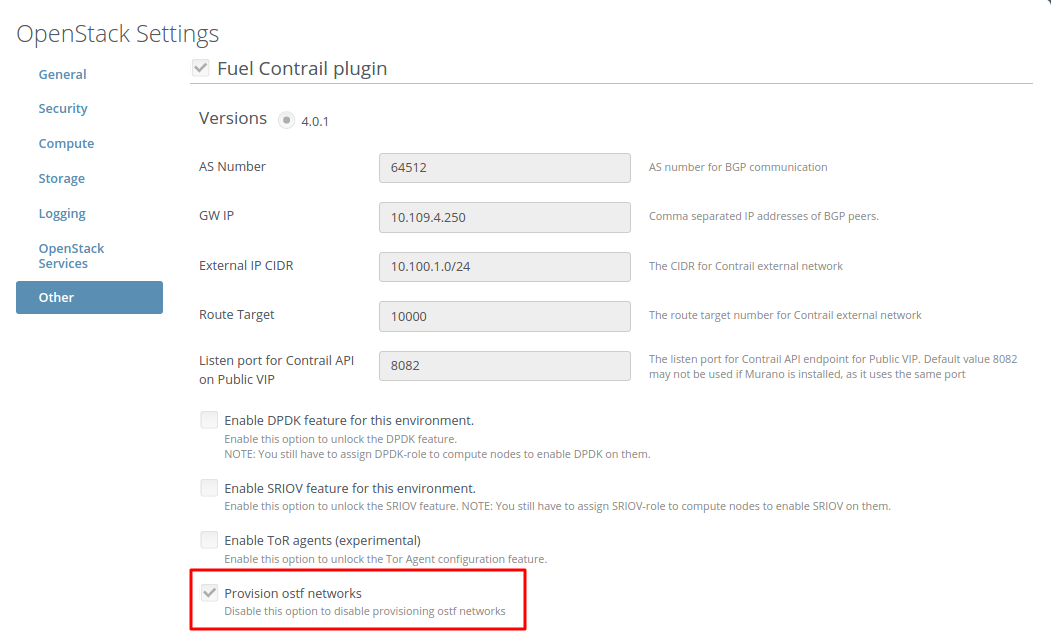
Enable the plugin and fill configuration fields with correct values:
- AS number for BGP Gateway nodes communication defaults to 64512
- IP addresses of gateway nodes provided as a comma-separated list - peer addresses for BGP interaction with border routers.
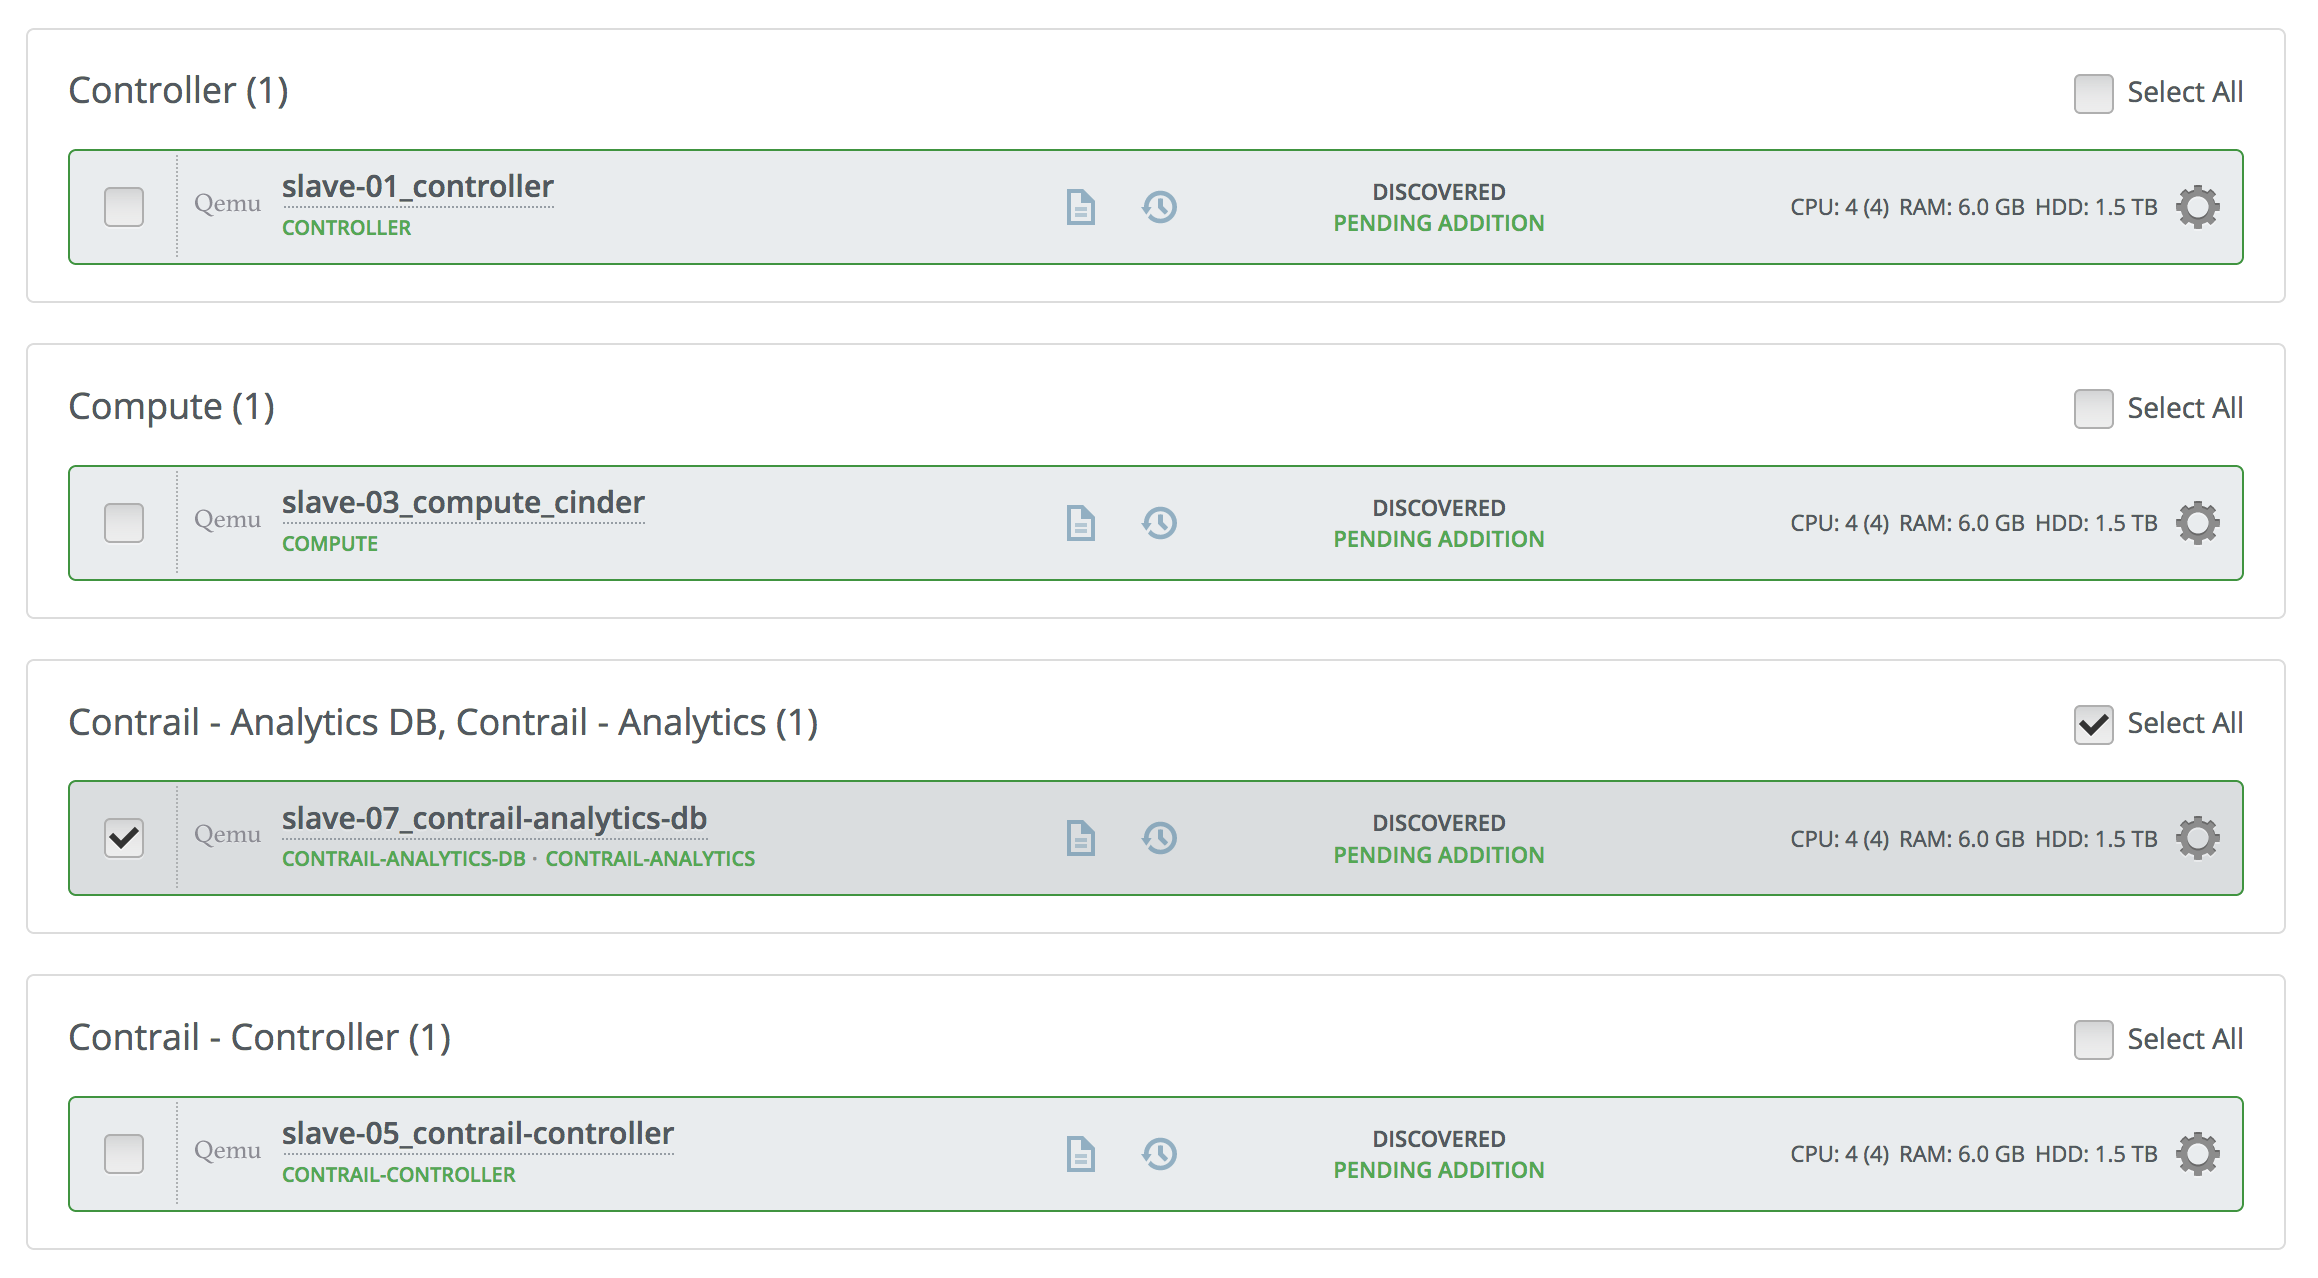
Add nodes and assign them the following roles:
At least 1 Controller
At least 1 Compute
At least 1 Contrail-Controller
Note
Three or the greater odd number of nodes recommended for HA.
At least 1 Contrail-Analytics + Contrail-Analytics-DB
Note
Three or the greater odd number of nodes recommended for HA.
If you plan to use Heat with autoscaling, in addition to Ceilometer you need to add node with MongoDB role
The figure below shows sample node configuration.
The recommended size of partition for the Contrail-Analytics database is 256 GB or more.
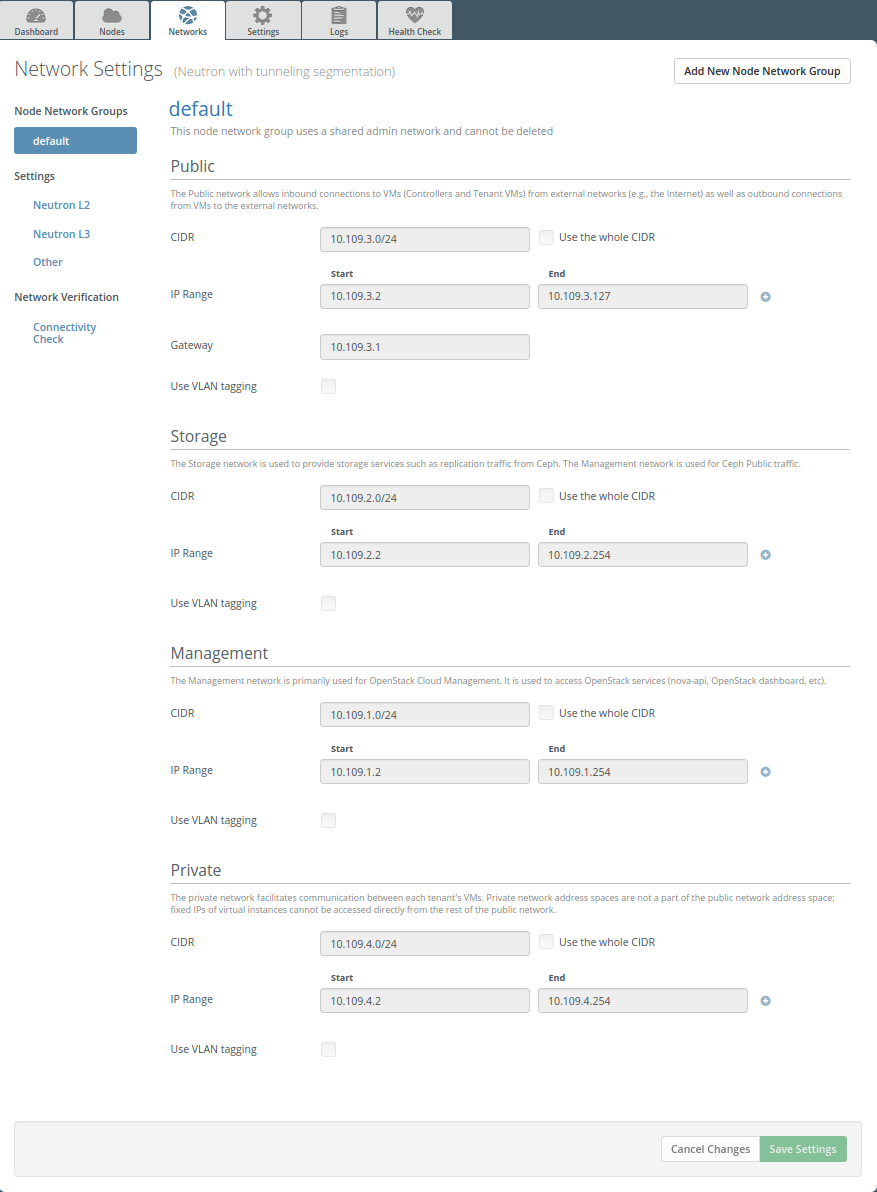
Configure the network settings. See details at Fuel User Guide.
Open
Nodestab, select all the nodes and pressConfigure interfacesbutton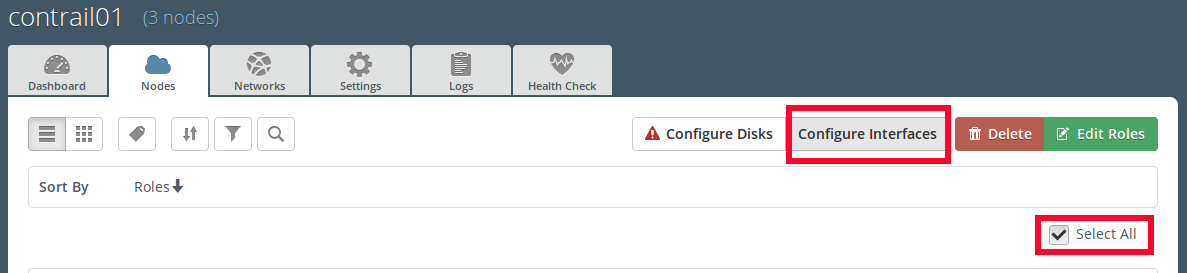
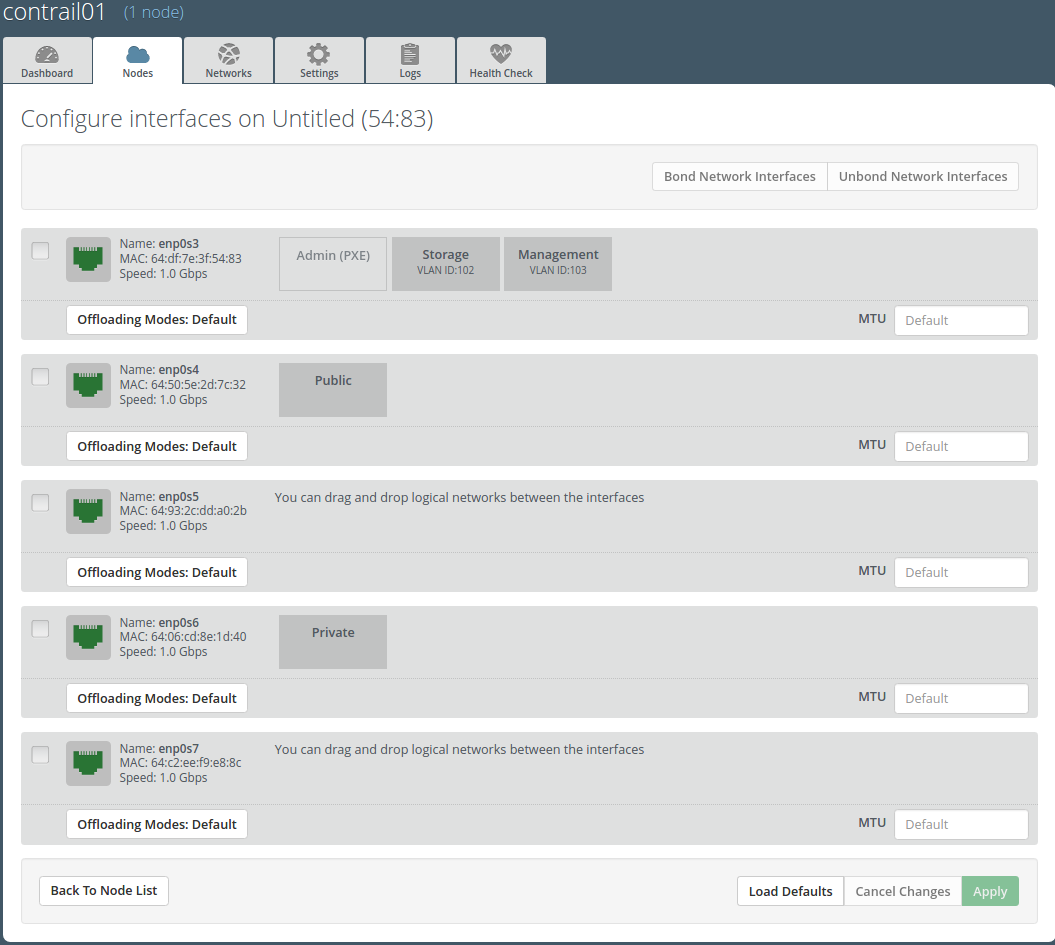
Set Private network to the separate network interface.
Warning
Do not use this physical interface for any other network.
Contrail vRouter will use this interface. Set the bigger MTU for Private interfaces, for example 9000, if switching hardware supports Jumbo Frames. This will enhance contrail network performance by avoiding packet fragmentation within Private network.
Warning
First usable addresses from the Private network will be used as VIP for Contrail controllers. For example, if your Private network CIDR is
192.168.200.0/24, then Contrail VIP will be192.168.200.1. If you want to use other IP as VIP, you need to specify a range for this network.
Example of network configuration
Use hardware servers with two network interfaces as OpenStack nodes. The interfaces configuration is as follows:
- Management and Storage networks are on the same interface with
Adminnetwork using tagged VLANs - The second interface is dedicated to Public network as untagged
- The forth interface is dedicated to Contrail operations as untagged (Private network)
Warning
* Be sure to launch network verification check before starting deployment. Incorrect network configuration will result in non-functioning environment.
Some environemnts may require changes to default networks created during deployment for OSTF tests. For example, the network allocated for floating IP addresses may need some exclusions in address allocation for more specific routes. This affects the ability to deploy changes to OpenStack environments with fails on default network creation. For this reason Contrail plugin settings have an option that disables creation of default ostf networks. By default, this option is enabled.
- Management and Storage networks are on the same interface with
Press
Deploy changesto deploy the environment (page 25).After installation is finished, you can access Contrail web UI using the same IP address as OpenStack Dashboard and port 8143 through HTTPS protocol. For example, if you configured public network as described on the screenshot above, then you can access Contrail web UI through
https://<Public-VIP>:8143.